Foreshortening – Creating Depth and Dimension in Art
If you are only just beginning to learn all about the various drawing techniques, it can become a bit daunting. You will find that some techniques are more challenging than others, such as foreshortening art techniques. What is foreshortening and how can you use it? Hopefully, we can help you understand what foreshortened drawings involve and how you can use this technique in your own drawings.
What Is Foreshortening?
A basic foreshortening definition refers to the way you perceive an object, and how it appears to recede in space. The idea is to create an illusion, where the object is seen from an unusual angle, which helps to amplify the dimensions and depth of a drawing or painting. You can apply this technique to objects, figures as well as landscapes. Foreshortened drawings are all about how to realistically present a three-dimensional image in a two-dimensional space. This involves the objects appearing to move away from the viewer. For example, if you want to draw a figure from a particular angle, you need to consider the linear perspective.
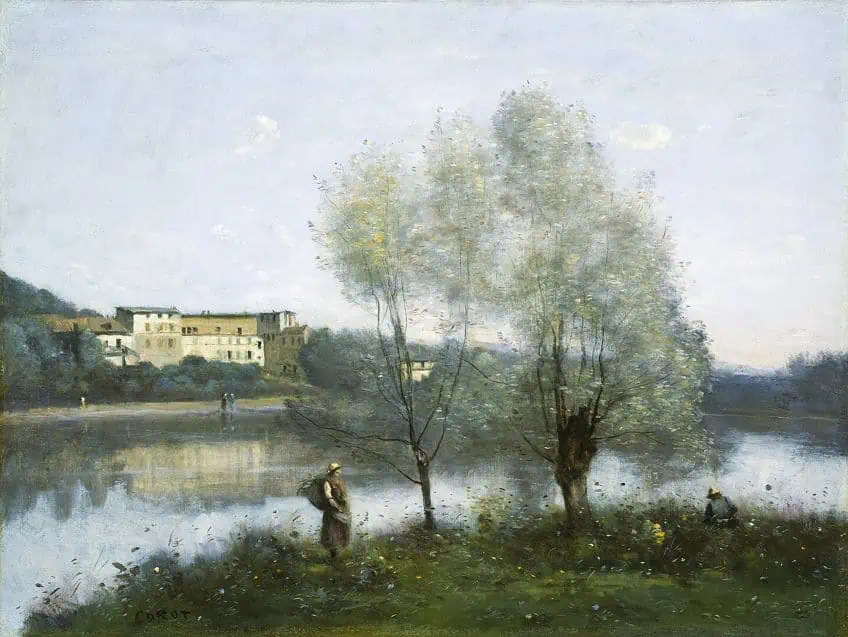 Ville-d’Avray (1867) by Jean-Baptiste Camille Corot; Jean-Baptiste Camille Corot, Public domain, via Wikimedia Commons
So, if a figure is in a prone position, with the head further away, it is natural to think that the head would be smaller, which creates depth. The feet are closer, so they must look bigger. When it comes to the torso and the limbs, this is where the image may appear “compressed” or foreshortened. This means the object looks shorter than it is in reality as it is angled in the drawing. Foreshortening occurs in both horizontal and vertical aspects.
Understanding Foreshortening
Foreshortening art is ultimately a perspective technique, which can be used to make objects like they are receding into the distance. The easiest way to understand how something is foreshortened is to use a simple example. The most common way to do this is to visualize it and to look at an object from different perspectives.
Take a simple pen and hold it in front of you lengthwise, if you had to draw this, you could easily create a two-dimensional and flat image. However, turn it slightly at an angle and you will have a slight foreshortening. Then turn it so that you are looking straight down the body of the pen. To make it appear longer and more three-dimensional, you would need to use a version of extreme foreshortening.
This will then create the illusion of length, adding depth and dimension to the drawing.
Of course, a pen is quite simple, foreshortening a figure and other objects can be more challenging. When a figure is foreshortened, it will affect how the limbs and body look. As mentioned, if you have a person laying on their back, with their head furthermost away, you will need to draw the head smaller and feet larger to create the appearance of depth.
When you do a foreshortened landscape, one of the more common images you can visualize is a long road that stretches into the distance, with trees lining the side. The edges of the road appear to converge in the distance, and the trees appear to get smaller and smaller. Any three-dimensional drawing or painting will require perspective techniques, including foreshortening.
Basic Principles of Foreshortening
When it comes to overall perspective, there are a few concepts you should take into consideration. There are a few perspective principles that artists use in their drawings or paintings. Let us have a look at a few of these including the foreshortening perspective.
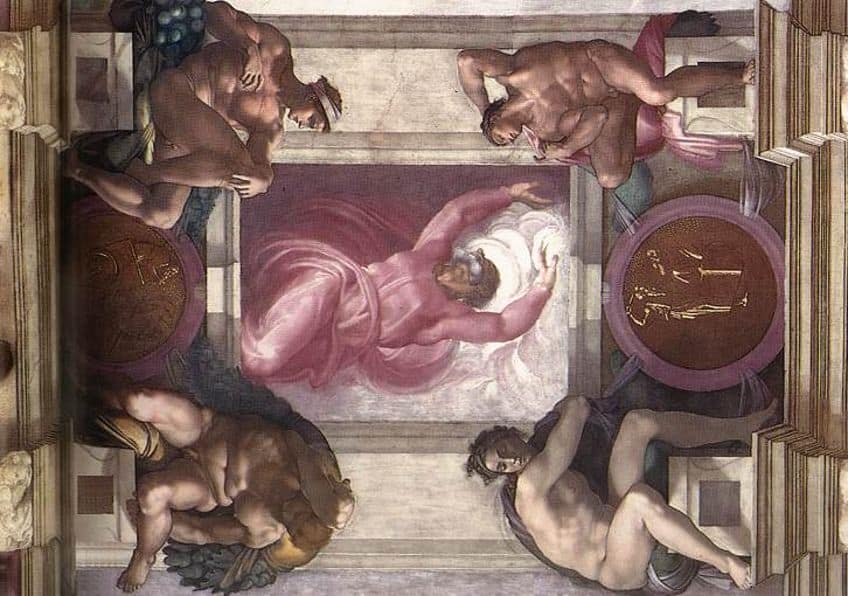 Sistine Chapel ceiling: bay 1: Separation of Light from Darkness (1512) by Michelangelo; Michelangelo, Public domain, via Wikimedia Commons
Form Sizes
Another term to use to help describe this principle is “diminution”, which simply means objects look smaller when they are further away. When it comes to perceptive or foreshortened drawings, objects can appear larger than if viewed normally, and the distance between them can appear shorter. In other words, the proportions along the line of sight look shorter than the proportions across the line of sight.
The reason is that in perspective drawing, artists usually use geometric shapes, and these represent the three-dimensional object on a two-dimensional surface.
Convergence
This is relatively easy to describe. Let us visualize a straight road that goes off into the distance. The road will have two parallel lines, and these will come closer to each other as the road stretches further away.
 A Quiet Monastery (1890) by Isaac Levitan; Isaac Levitan, Public domain, via Wikimedia Commons
Overlapping
This is when objects in the foreground of a drawing overlap those behind it. Placement on the paper means objects that are higher within the image, will seem further away. Overlapping is then simply the placement of objects over each other, which then creates a sense of depth or an illusion of three dimensions.
This can be done in painting, drawing, as well photography.
Vanishing Points
This concept directly relates to the convergence principle. The parallel lines that converge, land up at a single point. This point is called a vanishing point. Any scene or object created can have a single vanishing point, which is known as a one-point perspective. However, you also get two-point perspectives and three-point perspectives, or two and three vanishing points. These perspectives help us to grasp how objects are seen in three dimensions.
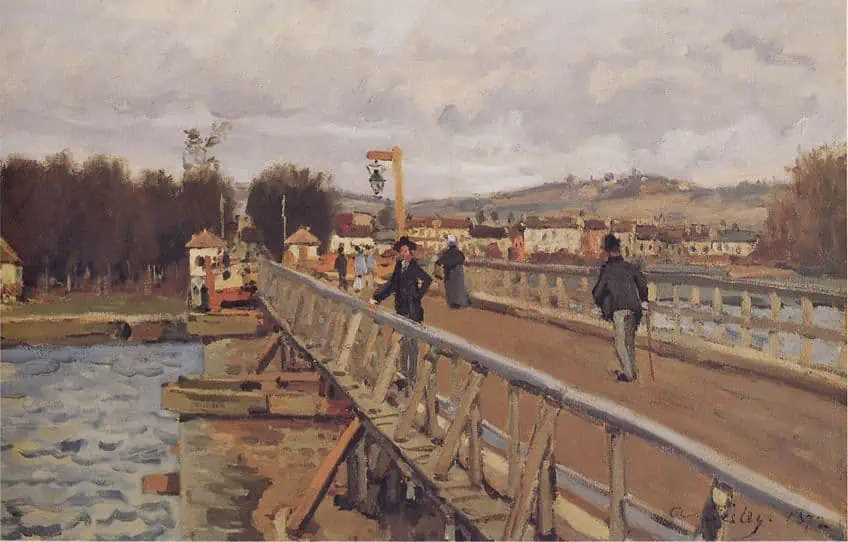 Footbridge at Argenteuil (1872) by Alfred Sisley; Alfred Sisley, Public domain, via Wikimedia Commons
Sticking with lines, you also get a horizon line, which is exactly what it means. A line where the land or water and sky meet. You might also know this concept as “eye level”. One of the aspects of a horizon line is that all the vanishing lines usually meet along it at some point. Horizon lines can be at the bottom of a page, or they can be in the center. Of course, if you have other images or looking into the sky, there will be no horizon line.
Foreshortening
When drawing foreshortening, the main effect is that an image will seem like it is being reduced as it moves away into the distance. The object will also seem to be shorter than it actually is. Any object in front will overlap the objects behind, and the magnitude of these effects depends on the range of foreshortening. As you will notice, all the principles we have dealt with above come into effect. When architects and other professionals use foreshortening, they rely on mathematical principles. However, as an artist, you do not have to be quite so precise.
You can get as close as possible to correct angles, but it only needs to look acceptable to the viewer.
Importance of Foreshortening in Art
If you want an object to look realistic and more interesting, you need to apply foreshortening to add the depth and dimension you need. An artist will look at an object at a distance or an unusual angle and will have to translate this onto a two-dimensional surface. By applying a foreshortening perspective, you can draw more detailed figure poses. Foreshortening also helps artists to catch the viewer’s attention and to draw them in.
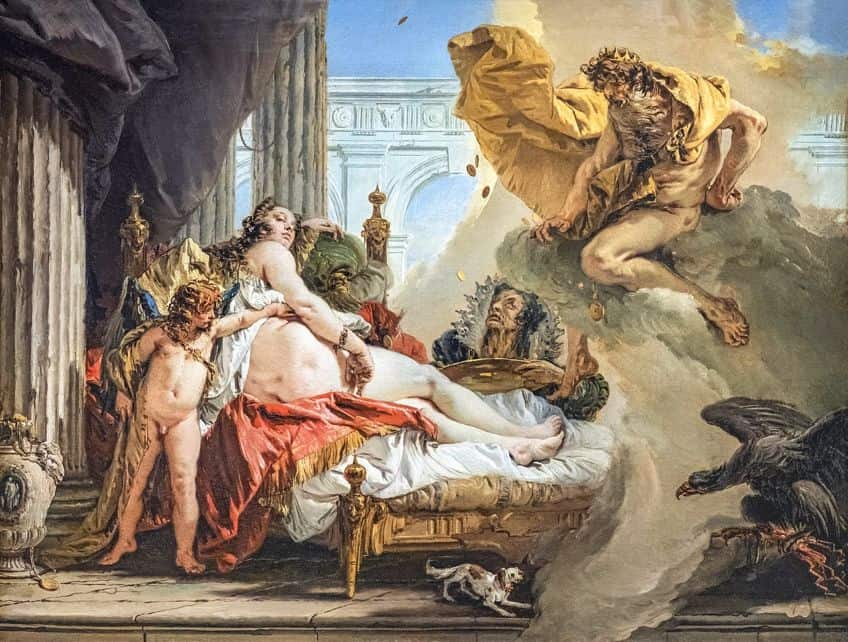 Danae and Jupiter (1736) by Giovanni Battista Tiepolo; Giovanni Battista Tiepolo, CC BY-SA 4.0, via Wikimedia Commons
Drawing foreshortening is more commonly done in still life as well as portrait or figure paintings, as the effects are more noticeable. However, you also still need to understand it when creating landscapes. When applying a foreshortening perspective in landscapes, the image is usually based on a one-point perspective or a single vanishing point, which helps to create an impression of depth.
Some examples where you might use this technique include the following.
- A river moving into the distance
- An angles view of a tree branch
- A fallen tree log at an angle
- A wave that is viewed from a certain angle
Techniques for Foreshortening
You should improve your artistic skills to achieve the drawings or paintings you want to create. To do this, you will need to practice and understand the various techniques. Some of the foreshortening techniques include the following.
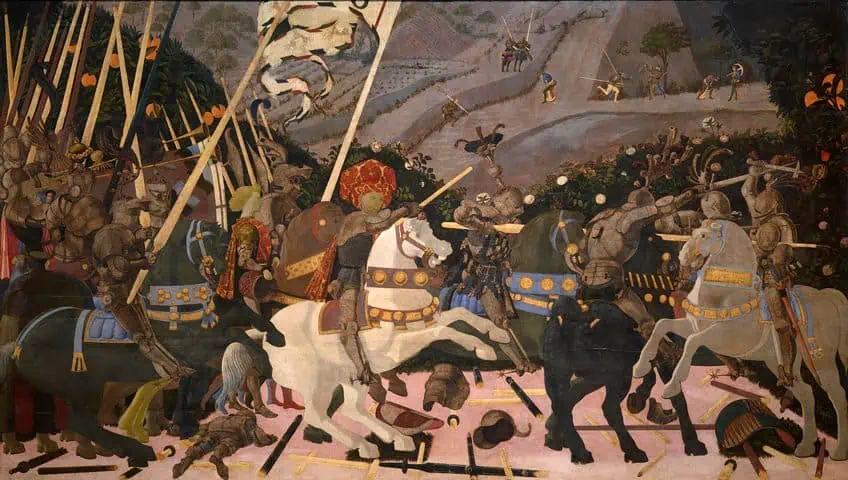 Battle of San Romano (1438) by Paolo Uccello; Paolo Uccello, Public domain, via Wikimedia Commons
Proportions and Anatomy
If you want to draw realistic figures, you need to understand perspective, and foreshortening plays a big role. You have to understand what happens to ordinary proportions when you draw from an exaggerated viewpoint. A figure standing straight and facing you, versus a figure lying down at an angle from you. The size and proportions change from objects closer and farther away.
So, you must have at least some rudimentary knowledge of anatomy before you can attempt to manipulate an image.
Importance of Reference
Reference is important for an artist to understand a subject better. It is also used to help create a more realistic composition. When you want to draw or paint something, you might need a reference to work from. This can involve a photo or reproduction, another existing art piece, or a directly observed figure or object.
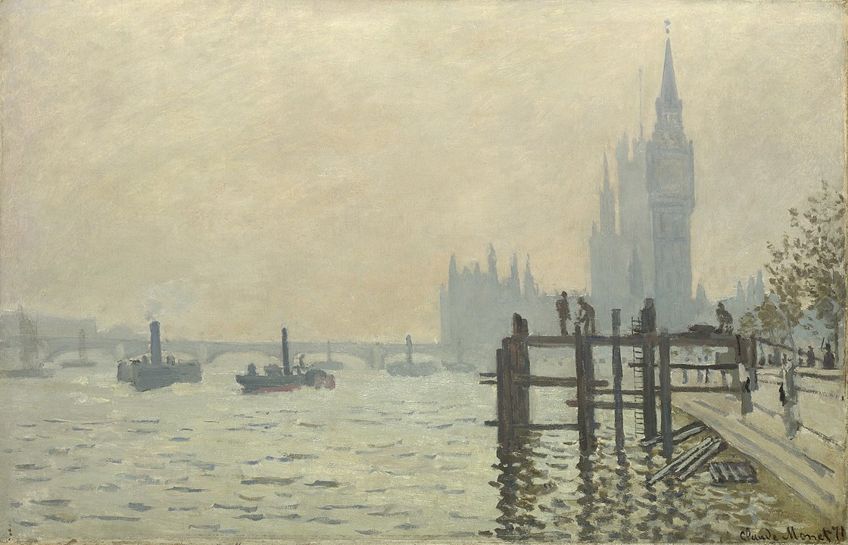 The Thames below Westminster (1871) by Claude Monet; Claude Monet, Public domain, via Wikimedia Commons
Understanding Light and Shadow
Light on an object provides brightness, while shade provides darker effects. A shadow is cast by an object onto another surface or from an extended part of an object onto itself. Understanding light and shadow is just as important as other techniques that provide depth and dimension. Foreshortening comes into play when you are viewing an object from the front, while if you view a shadow from above, it remains a normal shape.
This is so you can create a proper shadow shape when you draw from a frontal perspective.
How to Apply Foreshortening in Art
Considering the foreshortening definition and reading up on what this is all about, is different from actually applying the technique. You need to get in there, do, and practice whenever you can. Let us now deal with some basics on how to apply foreshortening in art.
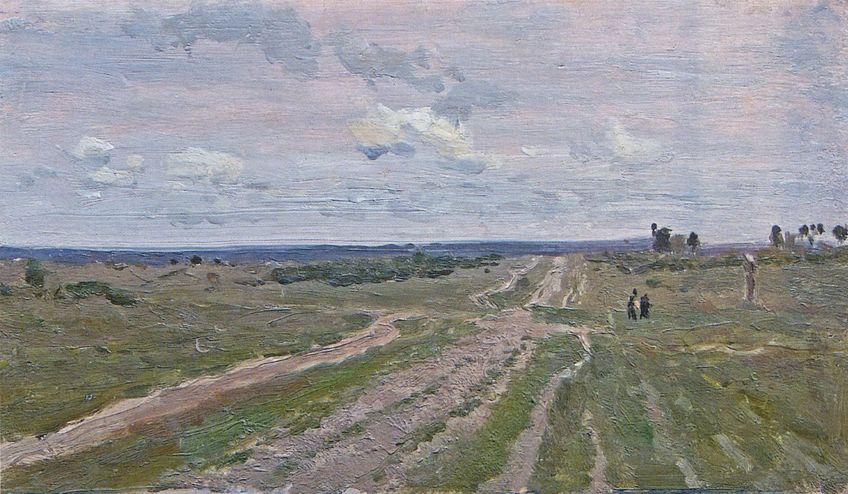 The Vladimirka Road (1892) by Isaac Levitan; Isaac Levitan, Public domain, via Wikimedia Commons
Using Foreshortening in Sketches and Paintings
When you begin drawing or painting a figure, you need to first visually measure the height. You do not have to be precise, but depending on the perspective you are going to capture, it can vary quite a lot. Draw a line, which represents the height from head to foot. The line can be curved, depending on the angle observed. This line will help you plan your space and set your boundaries. It makes sure the figure will fit onto the page, and act as a base for you to plan any other figure proportions.
If, for example, the perspective is from above the subject, the line will appear much shorter.
Adding Guidelines
Draw in lines, making a square or rectangle around the object or figure you wish to draw. And add a plumb line, which is a vertical line that can help act as a marker that measures accuracy as you build your composition. You do not have to place the line in the center. These lines are lightly added, so you can remove them when done. Some artists might use a piece of weighted string as a plumb line to visually create more accurate measurements.

You can then use more lines to chart out other proportions of the image. For example, lines for the shoulders and waist. The length and shape of these lines are dependent on the perspective of the figure or object. The lines could also be curved, and the distance between each line depends on your vantage point. Lines for the shoulder and waist will be different, the shoulders will have a longer line, while the waist has a shorter line.
Adding Large Form Shapes
If you are drawing a figure, try to forget what you think a human form should look like, because if you use foreshortening, the human form does not quite fit the way you think it should. Measure and draw what you see, and not what you assume it must be. Begin to draw in the larger form shapes.
You might consider the following techniques.
Coil Technique
Again, using simple shapes, you can create a three-dimensional image using coils, also called concentric ellipses. Lightly draw these coils with a pencil and follow the form contours. It is an easy technique that can help you to feel out the form you are trying to draw.

Geometric Shapes
Draw in geometric shapes, which can help to provide a better structure you can work with. Imagine the object you want to draw as a basic shape. For example, think of the limbs as tapered cylinders or the torso as multiple cuboid shapes. Consider how these shapes fit together, which should overlap, and which should be larger.
Once in place and the proportions are good, it can simply be a matter of smoothing out the rough edges to reveal the form.
Drawing Everything Together
Once all the larger areas have been covered and you have the basic form coming through, you can begin fleshing the image out. Remember, to consider the subject on paper in a three-dimensional form. Take note of how certain areas overlap and add as much detail as you like. Contour and shade create the sense of depth that is needed.

Foreshortening Examples in Famous Artworks
The foreshortening technique was first used as far back as the 15th century and can be observed in many famous paintings. One of the more famous examples you can find in The Sistine Chapel, in particular, The Separation of Light from Darkness (1512). The image of God is framed, and He seems to be rising, which is an illusion that requires foreshortening.
Below are two more foreshortening examples, where you can clear everything from extreme foreshortening to other foreshortening perspectives.
Andrea Mantegna (1431 – 1506)
| Title | Lamentation Over the Dead Christ |
| Date completed | 1480 |
| Medium | Tempera |
| Dimensions (cm) | 68 x 81 |
| Gallery | Pinacoteca di Brera, Milan, Italy |
| Place of origin | Padua, Italy |
A popular example, often one of the first to be mentioned when talking about foreshortening is Lamentation over the Dead Christ (1480) by the Italian artist Andrea Mantegna. You will notice that Christ’s legs and chest area appear to be shorter, to help convey a sense of depth.
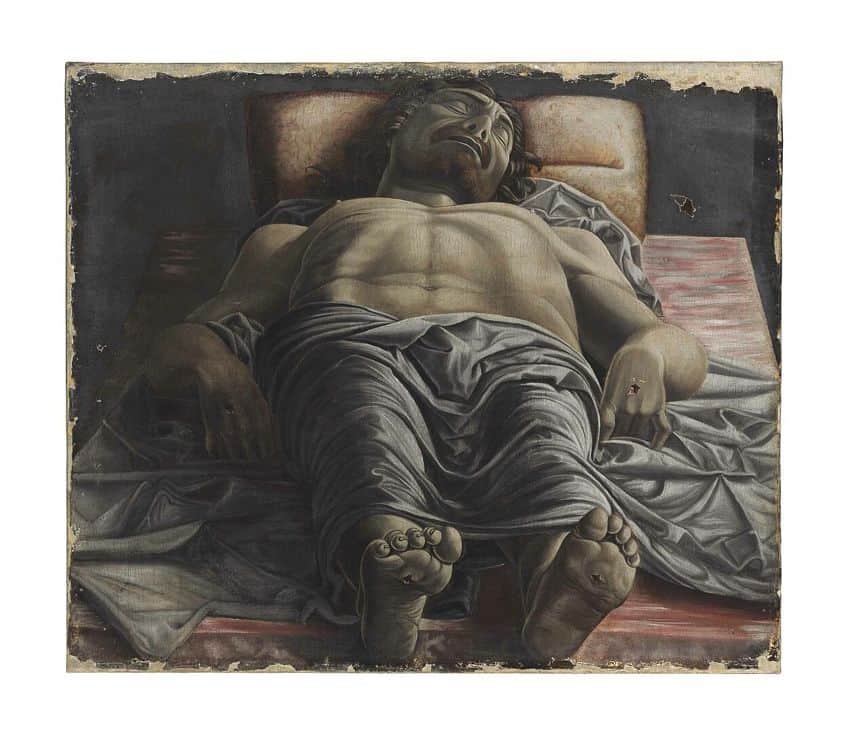 Lamentation of Christ (1480) by Andrea Mantegna; Andrea Mantegna, CC BY-SA 4.0, via Wikimedia Commons
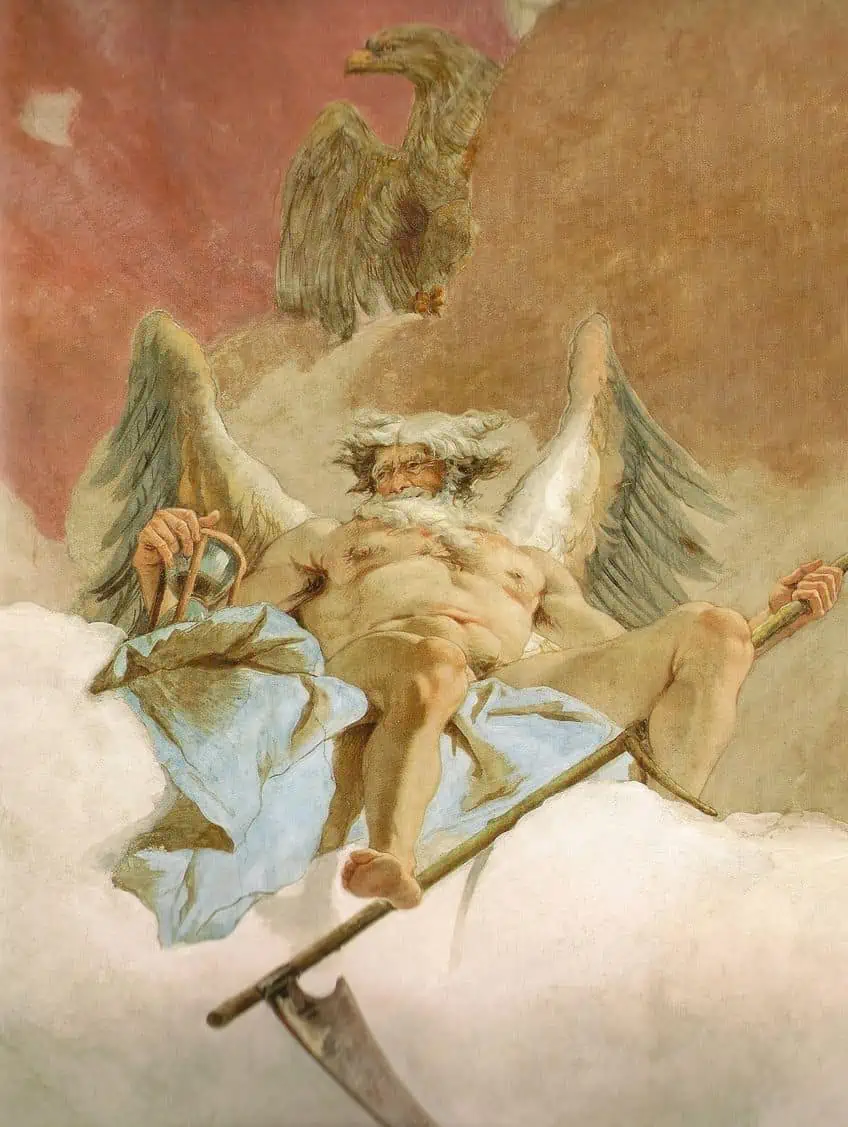
Antonio da Correggio (1489 – 1534)
| Title | The Assumption of the Virgin |
| Date completed | 1530 |
| Medium | Fresco |
| Dimensions (cm) | 1100 x 1200 |
| Gallery | The dome of the Cathedral of Parma, Italy |
| Place of origin | Parma, Italy |
Another famous example is the Assumption of the Virgin (1526 – 1530) by the Italian Late Renaissance artist, Correggio. He used spectacular foreshortening techniques to create this amazing fresco. It appears to be a multilayered vortex of images, with a foreshortened Christ in the middle, descending to unite with his mother.
 A detail of Corregio’s Assumption of the Virgin (1526-30); Antonio da Correggio, Public domain, via Wikimedia Commons
Common Foreshortening Mistakes to Avoid
Foreshortening might seem like a challenging technique to learn because if you do not get it right, the viewer’s attention will be drawn to these mistakes as it just does not look quite right. Let us touch on three basic mistakes to avoid.
Below is a summary of what Australian artist Stephen Travers considers three basic mistakes people make when foreshortening.
All Aspects of an Image Must Be Foreshortened
You cannot take one aspect of an image and then apply a foreshortening perspective. For example, If you take a wall with a few windows and you want to foreshorten these. The windows will then become more compressed and smaller as they appear at a distance. But it is important to also think about the space between the windows, this cannot remain the same, and also needs to be compressed along with the windows to create a more realistic appearance.
 Detail of the Frescos in the Würzburger Residence (1753) by Giovanni Battista Tiepolo; Giovanni Battista Tiepolo, Public domain, via Wikimedia Commons
Things Do Not Always Stay the Same
If you have an image, for example, the windows again and you have foreshortened these and the spaces between. However, what about the inside of the widow? You might have a cross frame for the window and automatically copy this onto all the windows receding into the distance. However, if you observe your reference closely, you should notice that what is displayed in the window also changes. The cross frame is clear in the first window, but as you go, the vertical line moves and becomes less and less visible, along with the view from the window.
The effectiveness of foreshortening can be as simple as correct observation in the smaller details.
Inaccurate Perspective Lines
Try to keep all the horizontal lines and vertical lines in perspective. Sometimes, you can be so focused on individual objects within a drawing, you can miss out on the bigger picture. In the end, this creates an image that is not quite aligned as it should be. Taking the windows as an example again; means aligning the tops of the windows with the top and bottom of the section of the building you are drawing.
Tips for Successful Foreshortening
Before going into foreshortening, it is best to consider a few things. Take your time in planning your sketch and observing the details of what you are drawing or painting. Once you have gained more experience, this process will become easier and quicker.
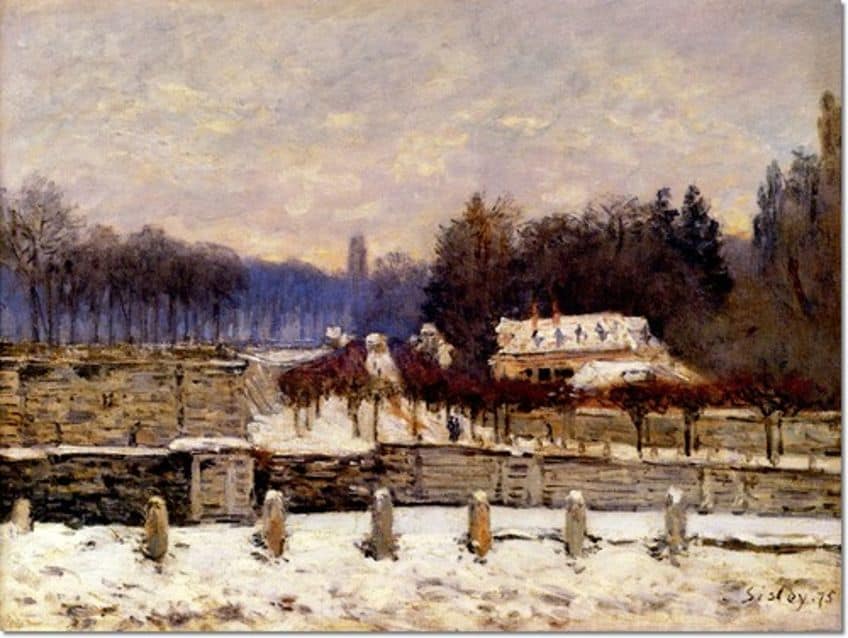 The Blocked Seine at Port-Marly (1875) by Alfred Sisley; Alfred Sisley, Public domain, via Wikimedia Commons
Be Aware of Space
Understand that whatever you are drawing also occurs within a space. The position of what you are drawing is important to the viewer. So, you should take into consideration if the object is moving away or toward you. Which elements are positioned closer to you? Being aware of these factors can help make foreshortening a little easier to apply.
Always Use Perspective Lines
Using perspective lines will make the whole process that much easier. These are the parallel lines that extend into the distance, away from you, and converge at a certain point. They help you to establish an appearance of depth in two dimensions.
You can also use the lines to help determine the size of various objects as they diminish into the distance.
Look for Overlapping Shapes
To make drawing a subject or object easier, use foundational overlapping shapes as a basis for your drawing. By breaking down the image into basic shapes, you can understand more of how everything is positioned and how they overlap in a space.
Seeing Through an Object
Try to think of the object you are drawing as transparent, allowing you to draw through it. You can follow the contours all around, underneath, and over. This will aid in the understanding of the form and position of an object within a space.
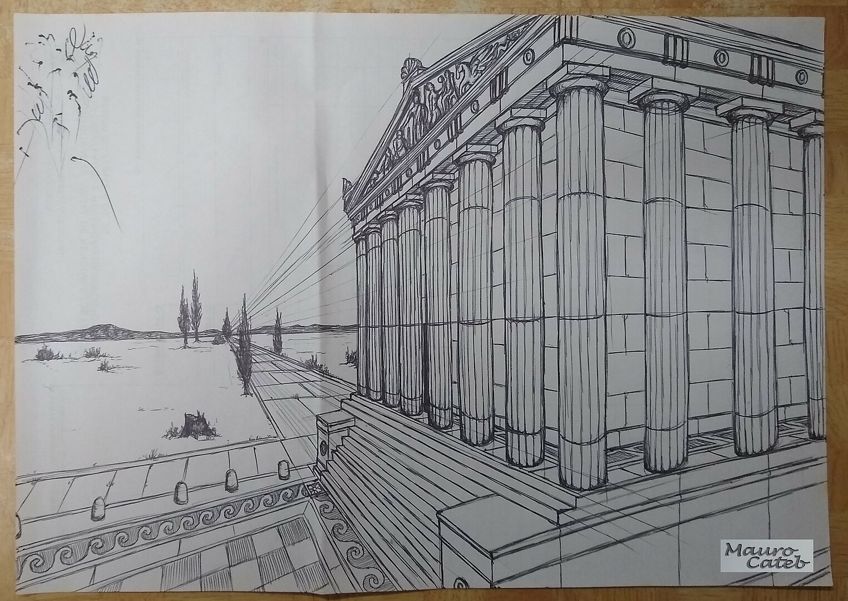 A perspective ballpoint-pen sketch by Mauro Cateb; Mauro Cateb, CC BY-SA 4.0, via Wikimedia Commons
Contours and Edges
Give thought to the outlines or edges and contours of an object or form. Some of the edges require more definition, while others can have a softer approach when seen from a different perspective. So, some edges are more important than others and require more attention to create a more realistic shortening effect.
Maintaining Continuity
You might have laid down a base of shapes that might have many edges. Do not let this break the continuity of the image. An overlap might cause a break in the flow of lines and create a disjointed composition.
You might have to pick up or highlight other areas to add a sense of continuity.
Adapt the Foreshortening
You can choose to experiment with how much of an effect you would like to produce. You can exaggerate and add drama by pushing the distortion to its limits or play it down for a more subtle effect that is often more cartoon-like and flat. Adjust it to your style of art.
Practice Exercises
To gain more understanding and better technique, you need to practice. You can do this by using various exercises that can help you understand foreshortening better. You should train your eyes and hands to recognize the best perspective. Below are some exercises you can try; it does not have to be a masterpiece; simple rough sketches are good.
- You can begin by practicing with simple shapes and then applying extreme foreshortening.
- You can take the same objects or shapes and try varying degrees of foreshortening.
- Make drawings that have multiple overlapping objects.
- Find a professional art piece that contains the foreshortening technique, make copies, and draw over these to get a feel for the technique.
- Experiment with using perspective lines to help create images that are on a relative scale.
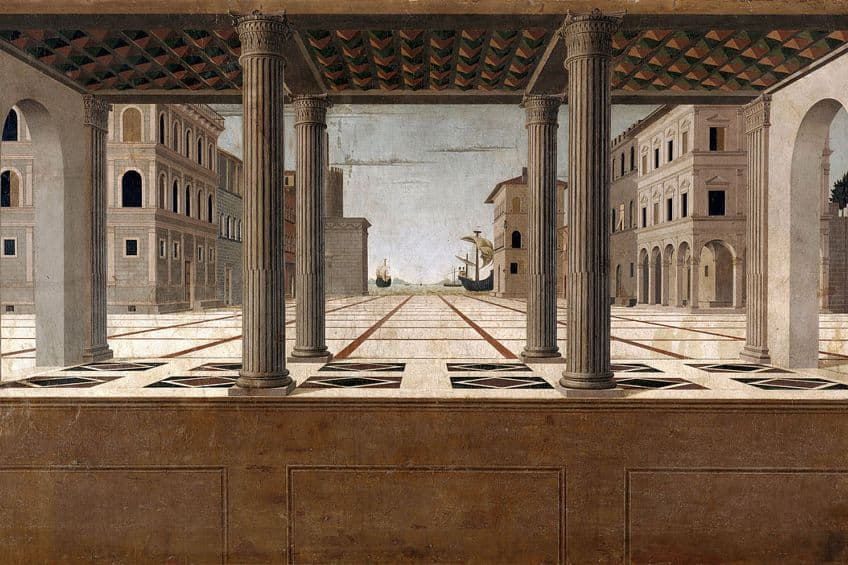
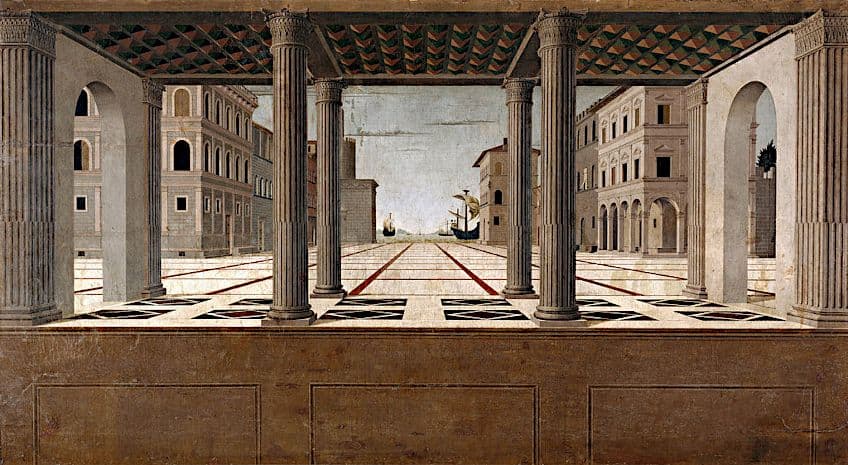 Architectural Veduta (1490) by Francesco di Giorgio; Attributed to Francesco di Giorgio, Public domain, via Wikimedia Commons
We hope that you have now gained a basic understanding of foreshortening art. By using the foreshortening technique, you will be able to create drawings that have more dimension and depth. Remember, it is by practicing this technique that you will be able to finally produce the perfect foreshortening perspective.
Take a look at our foreshortening in art webstory here!
Frequently Asked Questions
What Is Foreshortening?
Foreshortening in art is categorized as a perspective technique, which can help with creating an illusion of depth and dimension. There are various techniques you can use to achieve this, including the use of perspective lines.
What Is the Purpose of Foreshortened Drawings?
The basic idea or purpose of a foreshortened drawing is to convey an object that is viewed from an exaggerated viewpoint, and which is three-dimensional, on a two-dimensional surface. By applying foreshortening, you can accurately produce realistic drawings or paintings.
What Are the Three Main Foreshortening Effects?
The three main effects include producing objects that appear to become smaller as they move into the distance. Another effect is that objects seem shorter and appear more compressed than they are in reality. Also, objects that are positioned in front will overlap objects behind.
Is Foreshortening Similar to Perspective?
There are a few perspective principles and foreshortening is among them, along with convergence, and overlapping. Foreshortening is a perspective that helps produce the effects of depth. For example, if you stand at the foot of the bed and observe a person lying down, the person appears short, while the perspective means the feet are closer to you than the head.

Jordan Anthony is a Cape Town-based film photographer, curator, and arts writer. She holds a Bachelor of Art in Fine Arts from the University of the Witwatersrand, Johannesburg, where she explored themes like healing, identity, dreams, and intuitive creation in her Contemporary art practice. Jordan has collaborated with various local art institutions, including the KZNSA Gallery in Durban, the Turbine Art Fair, and the Wits Art Museum. Her photography focuses on abstract color manipulations, portraiture, candid shots, and urban landscapes. She’s intrigued by philosophy, memory, and esotericism, drawing inspiration from Surrealism, Fluxus, and ancient civilizations, as well as childhood influences and found objects. Jordan is working for artfilemagazine since 2022 and writes blog posts about art history and photography.
Learn more about Jordan Anthony and about us.
Cite this Article
Jordan, Anthony, “Foreshortening – Creating Depth and Dimension in Art.” artfilemagazine – Your Online Art Source. October 17, 2023. URL: https://artfilemagazine.com/foreshortening/
Anthony, J. (2023, 17 October). Foreshortening – Creating Depth and Dimension in Art. artfilemagazine – Your Online Art Source. https://artfilemagazine.com/foreshortening/
Anthony, Jordan. “Foreshortening – Creating Depth and Dimension in Art.” artfilemagazine – Your Online Art Source, October 17, 2023. https://artfilemagazine.com/foreshortening/.