How to Stretch Watercolor Paper – A Guide to Prepare Watercolor Paper
Many watercolorists will tell you just how much stretching watercolor paper improved their general painting performance. Watercolors can be extremely versatile and practical if the right preparations are made for the paper. Stretching watercolor paper prevents it from warping or buckling while sustaining plentiful layers of watercolor paint. There are several methods that you can follow to soak and stretch your watercolor paper. These processes can be quite simple but are also dependent on which method and what materials you prefer to use in your practice.
Contents
- 1 What Does it Mean to “Stretch” Watercolor Paper?
- 2 The Advantages and Disadvantages of Stretching Watercolor Paper
- 3 What is the Importance of Stretching Watercolor Paper?
- 4 How to Stretch Watercolor Paper
- 4.1 Method 1: Stretching Watercolor Paper with Gummed Tape and Board
- 4.1.1 Materials
- 4.1.2 Step 1: Prepare Your Watercolor Paper
- 4.1.3 Step 2: Pre-Cut Your Gum Tape
- 4.1.4 Step 3: Prepare Your Workstation
- 4.1.5 Step 4: Soak Your Paper in the Tray
- 4.1.6 Step 5: Remove the Paper from the Tray
- 4.1.7 Step 6: Prepare to Wet the Gummed Tape
- 4.1.8 Step 7: Allow Your Paper to Dry Properly
- 4.2 Method 2: Stretching Watercolor Paper with Masking Tape and Board
- 4.2.1 Materials
- 4.2.2 Step 1: Prepare Your Watercolor Paper and Tape Down the Watercolor Sheets
- 4.2.3 Step 2: Spray Water Over the Paper
- 4.2.4 Step 3: Spread the Water with a Sponge or Brush
- 4.2.5 Step 4: Allow Your Paper to Dry
- 4.2.6 Step 5: Start Your Watercolor Painting
- 4.2.7 Step 6: Remove the Masking Tape Carefully
- 4.3 Method 3: Stretching Watercolor Paper with Alternative Materials
- 4.4 Method 4: Using A Watercolor Stretching Board
- 4.1 Method 1: Stretching Watercolor Paper with Gummed Tape and Board
- 5 Common Mistakes When Stretching Watercolor Paper
- 6 Frequently Asked Questions
What Does it Mean to “Stretch” Watercolor Paper?
The simple solution to overcome the warping of watercolor paper is to stretch the watercolor sheets before starting a watercolor painting. The working sheet either undergoes the process of wetting paper materials or soaking with clean water, where it is then fixed to a hard surface to dry and return to its normal state.
This can take a couple of moments to prepare and quite a few hours to dry properly. Following the processes and methods below of how to stretch watercolor paper will ensure that the paper stays flat, tight, and consistent during the painting process.
The Advantages and Disadvantages of Stretching Watercolor Paper
If you do intend on using large quantities of water in your watercolor painting, it is important to understand the advantages and disadvantages of preparing and stretching watercolor paper. This knowledge will help you identify the qualities you seek for your painting and give some insight into how to stretch watercolor paper.
PROS
- Reduces distortion and warping of the page
- Paper remains flat once dry
- Paper becomes more tolerable to more layers of water
- Painting performance is consistent
- Enhances the quality of a watercolor painting
- Subtle improvement of color vibrancy
- Back-side can be rewetted to reduce warping
CONS
- Risk the possibility of damaging paper of value
- Higher weighted paper (over 300gsm) does not cockle or buckle
- Long drying time
Stretching Watercolor Paper vs. Unstretched Watercolor Paper
Unstretched watercolor paper has still been treated with the necessary chemistry and processes to maintain minor consistencies while painting onto the surface of the paper. However, once stretched, the paper experiences a wash that alters and expands the paper’s fibers.
| Characteristics | Stretched Watercolor Paper | Unstretched Watercolor Paper |
| Prone to Warping | ✘ | ✔ |
| Performance Consistency | ✔ | ✘ |
| Risk of Damage | ✔ | ✘ |
| Long Drying Time | ✔ | ✘ |
What is the Importance of Stretching Watercolor Paper?
Artists have often only discovered the revelation of how to prepare watercolor paper once they have experienced the frustration of battling with the rolling valleys, and crests of pooling water. These wrinkles and creases can become difficult to work on, and can often create unwanted consistencies in paintings.
Lighter sheets of watercolor paper (between 100 and 250gsm), as well as sheets of large watercolor paper, are more likely to buckle and warp under large quantities of paint application. Stretching watercolor paper is a common solution to help prevent your paper from misshaping when copious layers of watercolor are applied to the surface.
Watercolor Paper Should Ideally Be Stretched
Many watercolor artists do not choose to practice the process of stretching watercolor paper until they have stretched it successfully for the first time. This can take a few attempts of testing the process and is very much dependent on the paperweight you have selected.
It is highly recommended that you apply at least one layer of water to your paper and allow it to dry, to improve the general quality of your painting performance.
Despite the long drying period, you will certainly find the time and space to prepare your papers. You will also come away with striking results when you compare paintings that have been pre-stretched, versus an unstretched watercolor painting.
Why Do Artists Choose to Stretch Their Watercolor Paper?
When watercolor sheets and paper pads are initially bought by artists in art stores, it is commonly assumed that the watercolor paper is prepared to be painted onto immediately. This can be quite misleading because the paper will still warp no matter the quality of the paper itself.
It is common for artists to leave their paper unsoaked, painting directly onto the paper without the process of stretching. Each artist has their own preference, however, learning how to stretch watercolor paper certainly will improve the quality of your watercolor painting – it’s a process you just have to try!
Watercolor Paper is Not Just Paper
The most ideal quality of watercolor paper consists of one-hundred percent cotton fibers and a binding chemical called “sizing” which is gelatin, or a gelatin substitute, that assists in holding the paint and pigments to the paper. Sizing also prevents the paint from disintegrating within the paper fibers.
Without ingredients like sizing, untreated watercolor paper holds a higher absorption rate, which means the painting material will most likely distort, and colors might lose their vibrancy. Soaking the paper will also dissolve the sizing, allowing for a more consistent or repetitive surface.
Watercolor Paper Very is Fragile
Watercolor paper is manufactured commercially by factories across the world. The watercolor sheets are produced with all their fibers perfectly aligned in the same repetitive pattern which is the reason why the paper expands in those directions when water is applied in large quantities.
It is important to be aware of the fact that watercolor paper is still very fragile and could start to disintegrate if it is soaked in water for too long.
What Happens to Unstretched Watercolor Paper When Watercolor is Applied?
When watercolor sheets are stretched, they experience a substantial wash and submerge which expands the fibers, while being anchored and fixed at the edges to dry tight and intact. When media is applied to watercolor paper that has not been stretched, the moisture causes the surface of the paper to expand while it is wet – and shrink as it returns to its dry state.
When more and more media is applied, the paper experiences warping, distorting, and cockling – a term used to describe the warping of paper materials. The back of the paper inverts as the water collects and pools in areas.
This leaves caving dimples and ridges in the paper, and interrupts any control over paint flow.
How to Stretch Watercolor Paper
In short, there are four methods that you can follow on how to stretch watercolor paper. All methods generally follow the same process below, with alternative tools and materials:
- Soak or wet the watercolor sheet until it expands
- Drain excess water
- Fix the paper material to a flat surface
- Leave to dry
There are many ways to physically stretch watercolor paper and artists have most likely discovered their top method through personal practice. Depending on what materials and equipment you have, you might find certain processes work better than others.
Often, we do not always have the necessary apparatus and materials readily available. Therefore, here is a selection of alternative methods and processes of stretching watercolor paper, including how to stretch watercolor paper with gummed tape, how to stretch watercolor paper with masking tape, and alternative methods.
Method 1: Stretching Watercolor Paper with Gummed Tape and Board
This method uses a strong adhesive tape called ‘gummed tape’ which fixes watercolor paper to a working surface. This is done after the process of first soaking and wetting the watercolor sheet. This particular method is a great option for stretching sheets of large watercolor paper.
Materials
- Your choice of watercolor paper (recommended weight of over 300 gsm)
- Metal ruler
- Clean water
- Large clean tray for water
- Gummed tape or butcher tape
- Paper towel or sponges
- Newspaper
- A sturdy board that won’t warp or bend (polystyrene boards, gatorboard, any type of hardboard, or the backing of a picture frame will work well)
Following the steps below, you will learn how to stretch watercolor paper with gummed tape and board. Once you have gathered all of your materials, you can begin the process of stretching watercolor paper.
Step 1: Prepare Your Watercolor Paper
Cut or tear your watercolor paper with a ruler, according to the size you would like to work with. It is recommended to soak and stretch multiple sheets at a time, but if this is your first time –try using just one piece to start.
Stack your papers and leave them aside.
Step 2: Pre-Cut Your Gum Tape
According to roughly the size of your paper’s length and width. You can also pre-pinpoint your edges with a pencil to map your painting’s border.
Step 3: Prepare Your Workstation
Making sure that your workstation is ready is an important step, as you cannot work seamlessly in a messy and unprepared environment. Lay down a few sheets of newspaper onto the table you are working on and fill the tray with cold or lukewarm water.
Once you have done this, place the tray on top of the newspaper sheets to keep clean.
Step 4: Soak Your Paper in the Tray
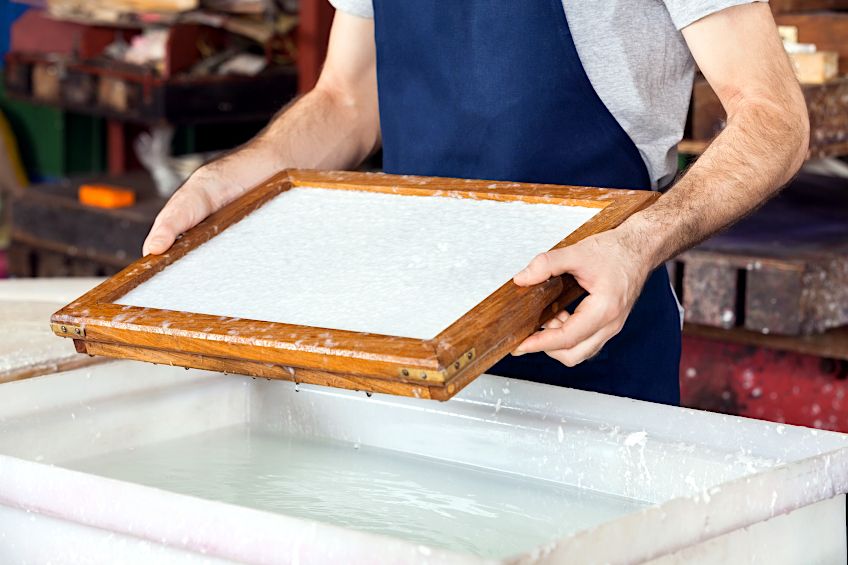
Leave to soak for two to three minutes, if the paper fits well. If the paper does not quite fit, turn it to fit the width of the tray. Hold both ends of the paper, curve the center and dip it consistently back and forth – pulling the ends through until it is completely submerged and evenly drenched with water.
Step 5: Remove the Paper from the Tray
Carefully lift the paper out of the tray and leave the water to drain and drip. Place the sheet onto the board by bowing the center of the paper first and allowing it to fall outwards by lowering the edges down. Remove any excess water with a paper towel or sponge to ensure consistency.
Once the paper is completely flat without any air pockets or warps, you can begin the next step.
Step 6: Prepare to Wet the Gummed Tape
Lightly brush or sponge water onto the gummed tape. Be careful not to apply too much water and wash away the gum adhesive. Also, be aware that the adhesive could potentially drip glue onto your paper which could affect your watercolor painting. Place the gum tape onto all four edges of your watercolor paper, covering about ¼ of the page. Press and trace a sharp flat object, or the tip of a fingernail, over the fine edges of the tape and paper edges to secure everything properly to the board.
Step 7: Allow Your Paper to Dry Properly
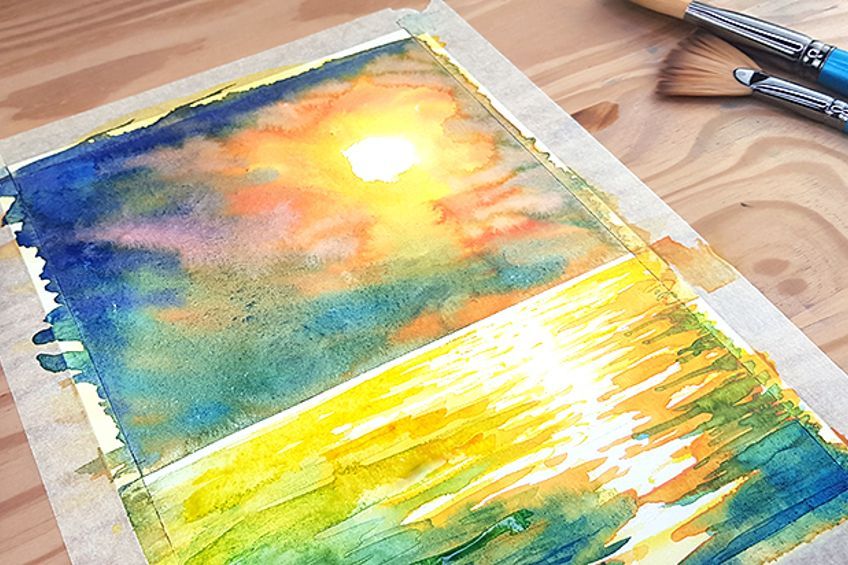
Your paper should ideally dry overnight. Once dry, it will be stretched. It is now time to create your artwork, without the difficulties of warping and pooling, while it is still fixed to the board. Once your painting is complete, you can remove it from the board with a craft knife, or carefully remove it by rewetting the topside of the tape.
If you do not have a large enough tray, you can follow through from step 6 and use a spray bottle – directly wetting paper while fixed to the board with gum tape.
Method 2: Stretching Watercolor Paper with Masking Tape and Board
This method uses masking tape in the process of stretching watercolor paper. It will show you how to stretch watercolor paper with masking tape when water is applied directly after the paper has been taped to a surface and left to stretch and dry overnight.
This is a wonderful option for artists that do not have gummed tape readily available.
Materials
- Your choice of watercolor paper (recommended weight of over 300gsm)
- Metal ruler
- Spray bottle with clean water
- Masking tape
- Sponge or paintbrush
- Paper towel
- A sturdy board that won’t warp or bend (polystyrene boards, gatorboard, any type of hardboard, or the backing of a picture frame will work well)
Following the steps below, you will learn how to stretch watercolor paper with masking tape and board. Once you have gathered all of your materials, you can begin the process of stretching watercolor paper.
Step 1: Prepare Your Watercolor Paper and Tape Down the Watercolor Sheets
Cut or tear your watercolor paper with a ruler, according to the size you would like to work with. Lay your paper flat onto the board and begin taping the edges by stretching and taping down the opposite ends first, until the paper is pulled flat. Press and trace a sharp flat object, or the tip of a fingernail, over the fine edges of the tape and paper edges to secure it properly to the board.
Hand-made paper will expand better than factory-produced paper.
Step 2: Spray Water Over the Paper
Ensure that the spray bottle is turned to the ‘mist’ setting and begin applying bursts of water over the surface of the page. Try avoiding the masking tape as it might become unstuck.
Step 3: Spread the Water with a Sponge or Brush
Quickly begin casting brushstrokes with a sponge or paintbrush in a consistent pattern of application – in one linear direction of the page, and then switch movement to the other direction. Repeat once or twice only or the paper will disintegrate.
Remove any extra water, dabbing lightly with the paper towel.
Step 4: Allow Your Paper to Dry
You may want to check on your paper during its drying time, as the masking tape can easily come undone. This will warp your paper and leave inconsistencies on the surface.
Step 5: Start Your Watercolor Painting
This is where the fun really begins! After you have tested your paper to see if it is fully dry, you can begin to paint your selected image or design onto your watercolor paper. At this stage, you will still be working with your paper taped and fixed to the board.
Let your creativity come loose at this step!
Step 6: Remove the Masking Tape Carefully
After your painting is finished and dry, you can remove the masking tape by carefully prying the tape from the edges of the paper, pulling away from the center and towards the outer edges. This will prevent the paper from pulling or tearing in places.
Method 3: Stretching Watercolor Paper with Alternative Materials
This method will show you how to stretch watercolor paper with alternative materials. If you do not have the above materials (gummed or masking tapes), you can still stretch your paper with just a few materials.
Materials
- Your choice of watercolor paper (recommended weight of over 300 gsm)
- Metal ruler
- Clean water
- Sponge or paintbrush
- Paper towel
- A sturdy board that won’t warp or bend (polystyrene boards, gatorboard, any type of hardboard, or the backing of a picture frame will work well)
Following the steps below, you will learn how to stretch watercolor paper with alternative materials. Once you have gathered all of your materials, you can begin the process of stretching watercolor paper.
Step 1: Prepare Your Watercolor Paper and Set Your Paper in Place
Cut or tear your watercolor paper with a ruler, according to the size you would like to work onto. Place your paper sheet directly onto the board.
Step 2: Apply Water to the Front of the Paper
Using a sponge, or paintbrush, apply a considerable amount of water to the front of the page in consistent layers. Using lukewarm water expands the paper quicker.
Step 3: Turn Over and Repeat
Turn the page over and add the same amount of water in layers until the whole page feels completely drenched and just about mimics a piece of cloth.
Step 4: Remove Excess Water
Roll two or three layers of paper towel over the front side of the watercolor paper and press firmly to remove any excess water.
Step 5: Place Heavy Objects
This process is not guaranteed to flatten and stretch your paper to perfection, so it is recommended to add a few heavy objects or books on top of the paper towel and leave them to dry for a few hours before starting your painting.
Method 4: Using A Watercolor Stretching Board
A watercolor stretching board is ideal for artists that use watercolor paints and paper every day in their practice. Watercolor stretching boards mostly come with everything you need to physically stretch the paper – except water, paper, and tools.
Stretching boards use a drum-like technique to pull and fix the paper, which allows the paper to dry securely and tightly.
Common Mistakes When Stretching Watercolor Paper
As mentioned, this process can take a few attempts before you discover the method that works best for you. It is crucial to be patient with your materials, as they will improve your quality and performance. The common problems you might face when stretching watercolor paper could be that the paper has not been soaked for long enough, or that the gum tape adhesive has dripped onto your paper or washed off.
Another issue is that the boards could have buckled and bent, leaving your page inconsistent in many places. If you experience either of these issues, it is recommended that you either start your entire process of stretching your paper again or replace the paper with new watercolor sheets.
Once you learn how to prepare watercolor paper and discover the method that works best, you can start preparing multiple watercolor sheets at a time. Stretching watercolor paper could even be your next favorite process. It can be valuable time spent planning and preparing space for new paintings. These preparations will also help you acknowledge the ease at which you can work and create beautiful watercolor paintings, without any bumps in the road.
Frequently Asked Questions
How Do You Stretch Watercolor Paper After Painting?
It is definitely possible to flatten or stretch a watercolor painting once it is complete. All you need is a spray bottle, two extra pieces of sketch paper (the same size as your painting), and a few heavy objects or books. You can begin by using the spray bottle mist and wetting the sheet evenly on the backside of the painting. Be careful not to over-wet your painting. Place your work onto a clean surface between the two extra pieces of sketch paper, with the painting still facing down. Place a few heavy and flat objects on top of the stacked paper, and allow it to dry overnight.
How to Stretch Watercolor Paper with Masking Tape?
In general, you can certainly stretch watercolor paper with masking tape. The watercolor sheets are first stretched and fixed to a board with masking tape. Then, layers of water are applied to the paper and left to dry. If the masking tape becomes damp during the process of wetting the paper, it is likely to become unstuck. Therefore, it is recommended that the masking tape be kept as dry as possible when stretching watercolor paper.
What is Watercolor Tape?
If generic masking tape or gummed tape do not quite work for you, watercolor tape is available as an alternative for stretching watercolor paper, as well as creating solid lines for borders. Watercolor tape is acid-free, easy-peeling without tearing or damaging the paper, and does not leave any sticky gum or residue onto the paper after use. It is readily available online, and stocked in most art stores and craft shops.
How Do You Use a Watercolor Block?
A watercolor block is a stack of watercolor paper fixed and bound together in one solid pad. Glue seals all four sides of the paper to the block, which keeps the watercolor paper stretched until it is removed from the pad. A watercolor block is a great option for watercolorists on the go!
Which Watercolor Paper is Best for Stretching?
Watercolor paper can come in many weights, forms, textures, and sizes. Most watercolor paper is acid-free, but some paper materials experience different processes such as hot presses and cold presses. It is important to find the paper that works best for your techniques. Large sheets of watercolor paper can be tricky to stretch, therefore, it is recommended to purchase sheets that are over 300 gsm in weight, if they are larger than size A3 and over.
Megan is a writer and researcher who holds a degree in Social Sciences, with a specialization in Psychology and Environmental Science, from the University of Cape Town. Her dedication to acquiring knowledge and making a positive impact has driven her current work in promoting conscious and sustainable growth in Southern Africa. Megan’s interests encompass exploring the physical and psychological impacts of color in our environment on our mood and well-being. She is also passionate about the role of art and creativity, which has been an integral part of society since the beginning of human history. Since 2022, Megan has been contributing blog posts on painting and color theory at artfilemagazine.
Learn more about Megan van Schoor and about us.
Cite this Article
Megan, van Schoor, “How to Stretch Watercolor Paper – A Guide to Prepare Watercolor Paper.” artfilemagazine – Your Online Art Source. February 18, 2022. URL: https://artfilemagazine.com/how-to-stretch-watercolor-paper/
van Schoor, M. (2022, 18 February). How to Stretch Watercolor Paper – A Guide to Prepare Watercolor Paper. artfilemagazine – Your Online Art Source. https://artfilemagazine.com/how-to-stretch-watercolor-paper/
van Schoor, Megan. “How to Stretch Watercolor Paper – A Guide to Prepare Watercolor Paper.” artfilemagazine – Your Online Art Source, February 18, 2022. https://artfilemagazine.com/how-to-stretch-watercolor-paper/.


