Resin Art – Learn Everything About Making Art with Resin
Are you an avid arts-and-crafter looking to add something big to your repertoire of creative exploits? If so, then you might have found yourself in the right place. In this article, we are going to be talking about resin art and the many marvelous artistic projects that can be created using this fascinating medium. Resin art offers experienced crafters the opportunity to explore a challenging, though infinitely more rewarding, new task.
Contents
What Is Resin Art?
Creating art with resin is something that artists have been doing for centuries. Understanding its preservation capabilities from the many swathes of prehistoric fauna encased in amber our archaeologists have dug up over the years, we have long since established means and methods of replicating that principle in art.
Using tree sap (amber) or, more commonly today, epoxy resin, artists can apply this chemical to their artworks while it is at a low viscosity.
It can be mixed with various additives to supply different textures and pigments for different colors. Over a period determined by how much resin is applied, the resin can be mixed with a hardener and begin to solidify into an incredibly resilient plastic. For this reason, artists can not only paint objects but also cast them in resin, opening the door to a whole new world of creative opportunities.
Before it solidifies, the resin will remain entirely malleable which offers users a wealth of versatility that can be exploited to achieve remarkable results. Better yet, resin medium becomes extremely tough and durable once hardened. Even then, the texture left behind after the resin has completely solidified is that of a stunning, glossy finish.
In art, resin boasts a ton of popular uses and functions. One of its simpler applications is as a sealant for works of art such as oil paintings, drawings, sketches, and photographs.
This would be on account of how well resin works as a glossy varnish that offers both aesthetic and protective benefits. If you are interested in learning more about resin art or would love to find out how to start and finish your resin art projects, stick around. We will be getting deep into the topic and even providing instructions on how to produce some awesome works of art using epoxy resin.
History
As far as we know so far, the presence of resin in art dates back more than 2500 years ago during the period of Late Antiquity where in Ancient Greece amber was used to create talismans and other such jewelry. But even before then, the use of tree resins as fixative materials for the construction of complex tools and weapons dates even further back to the Neolithic Period.
The universal popularity of resin as a material is on account of the versatility afforded by the modern varieties of the product.
Unlike Ancient Greece, we can produce our resins, like epoxy resin, using artificial chemicals. This also lends the benefit of us being able to produce mixtures of chemicals that produce stronger resins with additional properties that we can manipulate to suit many different functions. To this very day, resin still sees frequent use in a wide variety of tasks ranging from the commercial to the industrial on account of its mechanical properties.
Resin’s history as a functional material is no doubt illustrious, but why does it play such a prominent role in the world of arts? While amber art has been around since the Middle Ages, it has remained a rare and expensive resource reserved for the most well-established and affluent artisans to tinker with. Nowadays, however, we have artificial resins like epoxy resin for sale in hardware stores and craft stores worldwide. Not only are these chemical resins affordable but they are also way more durable and versatile.
Chemical resins are a relatively new invention, having only been conceived in 1934 by the German chemist Paul Schlack who found that, by inducing a chemical reaction between amines and epoxides, you could create a low-viscosity plastic that would solidify into any desired shape once dried.
Over the next few years following Schlack’s discovery, the claim over where epoxy resin had originated would be disputed between him and another chemist, a Swiss man named Pierre Castan. Regardless of whether or not either man truly fathered the now-famous material, the pair would nevertheless be at the forefront of epoxy resin technology and play instrumental roles in developing the formulas we use today.

Long before ideas of artistic potential entered the conversation around the use of epoxy resin, Castan had his eyes set on using the resin to create dental molds and prosthetics. Shortly after, however, he would introduce different mixtures of epoxy resins fit for use as wood varnishing and as an adhesive.
With his list of successful epoxy resin projects growing ever higher, Castan soon attracted the attention of Ciba Ltd, a chemicals company based in his home country of Switzerland.
After purchasing the license for Castan’s materials, Ciba would eventually find itself among the world’s top three producers of epoxy resin. Shortly thereafter, the American company Devoe & Raynolds developed its version of epoxy resin consisting of a mixture between epichlorohydrin and bisphenol-A.
With so many different versions of epoxy resin being produced around the world, its availability to the general public skyrocketed while costs dropped on account of the growing competition in the market. Thus, between the late 40s to early 50s, artists began experimenting with epoxy resin and adapting it for many different kinds of creative applications. The first generation of artists to play around with epoxy resin were quick to discover inventive ways to add pigments that would make it an effective medium for painting.
Not long after, people began using epoxy resin to create molds and preserve art of all kinds. During this time period, epoxy resin also began making an appearance in the creation of jewelry.
What Is Epoxy Resin?
To put it in simple terms, an epoxy resin is a composition of two primary materials, a resin, and a hardener, which upon combining will stimulate a chemical reaction whereby the resin will begin to solidify into a hardened structure within a few hours. The reason why we can make use of epoxy resin in so many different ways when it comes to arts and crafts has to do with the fact that it is completely malleable before it hardens, meaning we can shape it as we please to create all sorts of shapes and forms.
Epoxy resin also has outstanding adhesive properties and can stick to most surfaces which allows us to use it in painting, coating, sealing, and in varnishing.
There are two types of epoxy resin used commonly in art, casting epoxy and coating epoxy. In this article, we are going to specifically discuss the uses of these two particular epoxy resins in arts and crafts projects. We will be going over these two types of epoxy resin in greater detail before moving on to discussing the types of DIY resin art that they can be used to make.
Casting Resin and Coating Resin
While both forms of resin may not differ much in terms of their chemical composition, casting resin and coating resins may still vary greatly in their applications and uses. Coating resins are most often used, as the name would imply, as a means to coat and seal an object.
Casting resins, on the other hand, will see more use in the creation of molds for figurines and pieces of jewelry, and to preserve objects in stasis.
That being said, both resins could be used interchangeably in various scenarios. So why the need to differentiate? These resins have different names because the projects they are used for requiring varying levels of viscosity and pouring depths which make for different curing and processing times. Here are some of the key differences between casting and coating resins.
Pouring Depth
When using epoxy resin for casting, you are typically looking at the application of thick layers. These layers can be as thick as necessary but typically exceed a few inches. When casting molds, for example, you need to apply enough resin to accommodate the dimensions of the object being molded.
Because we use casting resin to create molds or preservation, we expect the maximum pouring depth to be higher than that of coating resin projects which typically require maximum pouring depths below 4 inches. Applying too much epoxy resin during a coating project could cause the curing process to speed up which may lead to some issues.
Viscosity
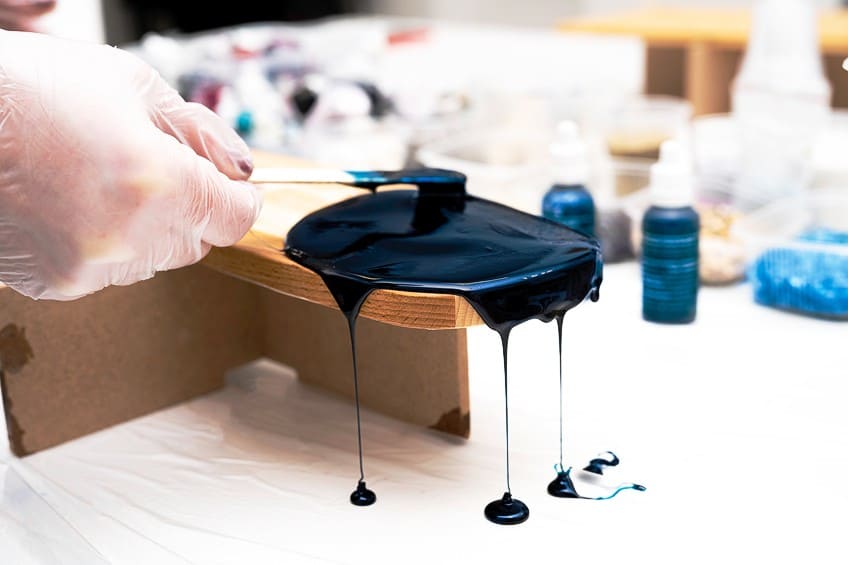
Due to the nature of each resin’s intended uses, they also differ in terms of thickness. Typically, you will find that casting resins have a much lower viscosity in comparison to coating resins. The reason why coating resins are much thicker has to do with the need for dense coats that adhere to surfaces both horizontally and vertically.
Casting resins, on the other hand, are designed to have a highly viscous consistency so as to slow down the rate at which it cures.
Having a slower curing rate as opposed to coating resin is important since casting resin often needs to be poured in thick layers. The viscosity of casting epoxy makes the application of thick layers possible by reducing the amount of heat generated. But its viscosity is also what makes it undesirable as a substitute for coating resin since it has weaker adhesive properties and can run off the surfaces it is applied to.
Time to Cure
Coating resins, on account of their lower maximum pouring depths, will cure and solidify much faster than casting resin. Since coating resins are applied in thinner layers, it takes quicker for coats to release heat. It is, however, prudent to not exceed the recommended maximum pouring depth for coating resin projects.

If your layers are too thick, heat will not be able to escape fast enough which may cause cracks in the finish. It will typically take between 12 to 24 hours for a coating resin to cure and will feel as if they have set to the coated surface within twenty minutes. Casting resins will take between one to two days to cure entirely and may take up to 18 hours to solidify depending on the size and dimensions of the project.
Time to Process
As opposed to the time to cure, this refers to the window of time in which you can coat, mold, or otherwise work your epoxy resin before it begins to set or “gel”, as it is commonly described. As soon as this chemical process gets underway, working with your epoxy will begin to get more difficult as it begins to harden. This may also prevent you from popping air bubbles still trapped in your resin at this point.
Since casting resin’s viscosity allows for it to cure slower, it effectively provides users more time to work with it before it begins to harden. Coating resins, in turn, have a very small processing time which is important to consider when working with it since time is of the essence.
You are generally looking at a window of about 20 minutes in which to prepare and then apply your coating resin before it becomes difficult or impossible to work with. Keep in mind that for both resins, exposure to additional heat from things such as the sun will speed up the curing process and decrease working time even further.
Toughness
Coating resins will typically produce harder finishes compared to casting resins. This is on account of the latter’s discrepant ratios of mixing which leads to different sections having varying levels of hardness. Since resin will contract or expand in response to varying temperatures, rigid structures placed in these conditions are likely to crack at some point.
It is for this reason that objects made with casting resin need to be designed with a degree of flexibility in mind as this would greatly decrease the likelihood of the structure cracking. An easy way to make your casting resin structure more flexible is by changing the ratio of hardener that is applied. The amount by which you alter the ratio of hardener should be informed by the instructions provided by the manufacturer of whatever particular brand of resin you are using.
How to Do Resin Art
As promised, we will now be sharing with you some advice on how to do resin art. We are going to walk you through two very exciting resin projects for beginners and experts alike to learn from so they may further expand their experience with the creative arts. We are going to discuss how to make resin art in the following ways:
- Painting art with resin
- Resin casting with a silicone mold
If you are interested in learning how to do resin art with either of these projects, stick around to read through the following step-by-step instructions where we detail how best to accomplish these tasks. A world of boundless creative opportunity awaits.
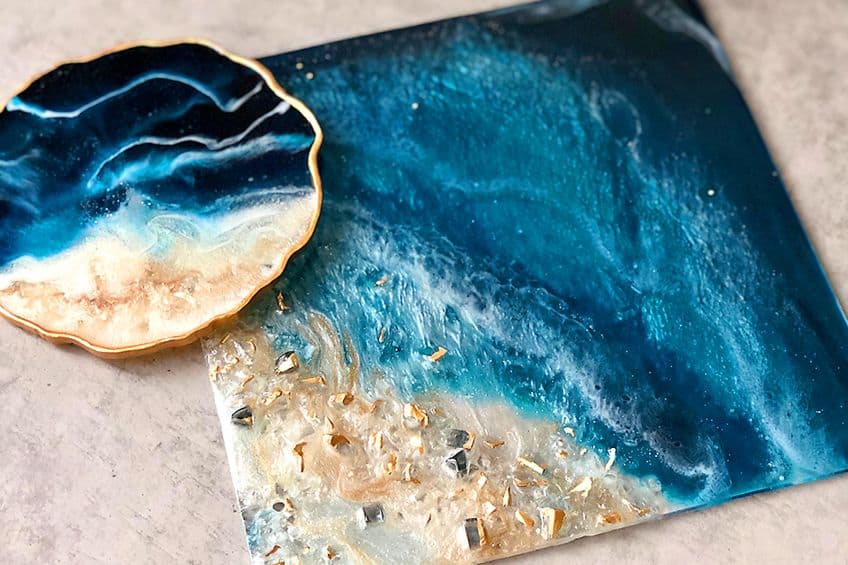
Painting Art with Resin
When it comes to painting, the use of resin as the primary medium offers a one-of-a-kind experience and works of art with a distinctly unique style. Compared to traditional mediums such as oil and acrylic paints, using resin for painting is considered somewhat nouvelle, something birthed from the creativity of the new generation of artists.
Resin painting, while fun, is considered an advanced style of painting as it requires practice, education, and patience.
Epoxy resins can also be mixed with pigments and additional materials to give it certain textures, colors, and details – the options are limited only by the imagination of each artist. Artists can configure and tinker with their mixtures to achieve all sorts of creative ends. If you have limited experience and do not know how to make resin art, you can find instructions on how to make or purchase certain epoxy resins for certain effects.

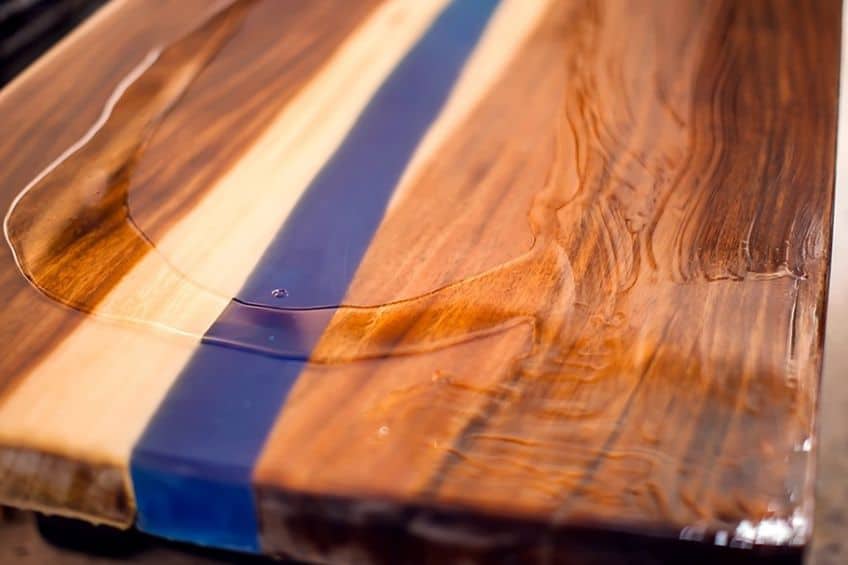
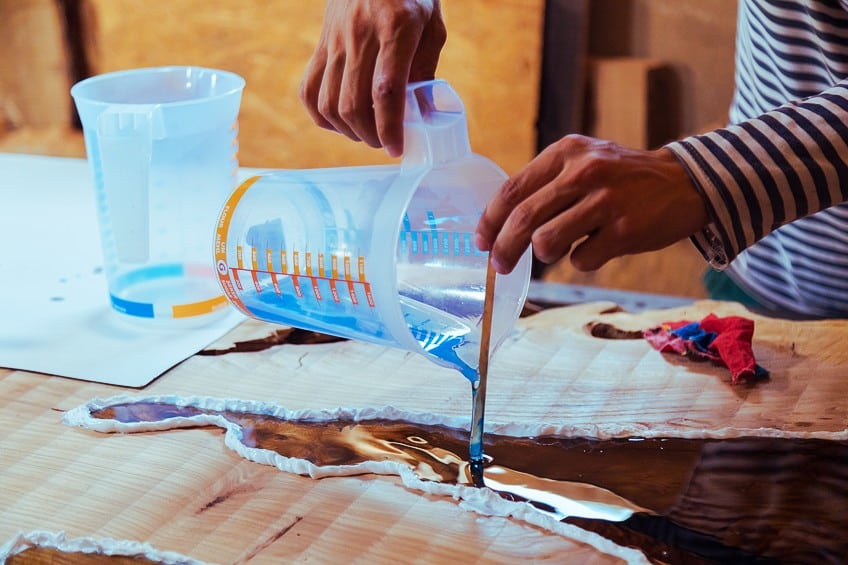
Your choice of painting ground is also important to consider when picking out your ideal epoxy resins for the particular tasks at hand. You are advised to avoid using traditional paint canvases when painting with resin. This is because the resin is heavier than traditional paints such as acrylic and tempera and can cause the canvas to sag under the weight. This weight would naturally cause all the resin to pool in the center of the canvas. The best surfaces for coating resin are wood, metal, plexiglass, glass, concrete, and stone to name a few.
Epoxy resin can be applied both horizontally and vertically and can be used on all sorts of furniture and décor. Tables and floors can also be painted with epoxy resin.
How to Paint Using Epoxy Resin
The most important thing to understand about painting with coating resin is that, as we have already discussed, you have a small window of time in which to apply it before it solidifies and becomes difficult (if not impossible) to paint with. This means that you should have a pretty clear picture of what you want to create before you mix your chemicals and get started.
If you are interested in resin projects for beginners, you should practice on a small scale before committing to a project like this.
So, understanding you have a limited amount of time to work with your medium when painting using resin, here are some things you should do before mixing your chemicals so that your workplace is ready for action as soon as your resin is prepared:
- Make sure that your workspace is clean enough to eat off. Any sort of dust particles that could be disturbed by movement during the painting process and land on your project. You should avoid this at all costs because it is incredibly difficult to remove particles and debris from a work surface covered in resin.
- Make sure that you have all the right protective equipment at hand and that you have provided the workspace with ample ventilation. We will touch on what sort of personal protective equipment you should have when resin painting.
- Arrange your workspace in a way that makes all the materials, equipment, tools, and equipment within arm’s reach.
- You should use the time before mixing your resin to prepare your painting surface. For starters, you can apply painter’s tape to the back frame of your surface. This is so that any resin that collects on the underside of the surface can be peeled off easily, preventing any bumps, mess, and grooves from forming at the back of your resin painting’s base. You can also apply tape to the sides of thicker surfaces to prevent resin from dripping and hardening there as well.
- The surface you are going to paint needs to be elevated from the table you are operating on. The best things to use for this are jar lids of the same proportions, although cups can work just as well as long as they are all the same size. Make sure that your surface is sitting at a 180˚ angle and perfectly horizontal to prevent the resin from pooling in any particular section.
- Lastly, before you get to mixing and painting, make sure your hands are covered with nitrile gloves and that you have a thick long-sleeve shirt or jacket on. It is important to note that latex and vinyl gloves will not cut it.
Now that your workstation is appropriately prepared, you can move on to the painting part without having to worry about any tasks unrelated to painting. You can now get your resin and hardener ready and get to the most fun part of this exercise. Here are instructions on how to go about the painting process.
Start Mixing Your Resin
A key aspect of knowing how to do resin art lies in the knowledge of how to correctly mix and prepare your resin before application. Somewhere inside or on the packaging for your resin will be clear instructions on how to mix the epoxy with its accompanying hardener. The ratio in which you mix your materials must correspond with the specific instructions that come with your chosen resin.
Different resins have differing ratios of epoxy and hardener so there are no universal ratio mixing instructions.
You can mix your epoxy and hardener in a bowl, taking careful note of the ratios you are pouring. You are advised to mix your resin inside a plastic cup, bowl, or container. This will help with clean-up and allow you to reuse the containers for the same purpose in the future because the epoxy resin will not adhere to plastic surfaces!
For the same reasons, you are encouraged to use a plastic utensil (like a spatula) to mix these compounds together.
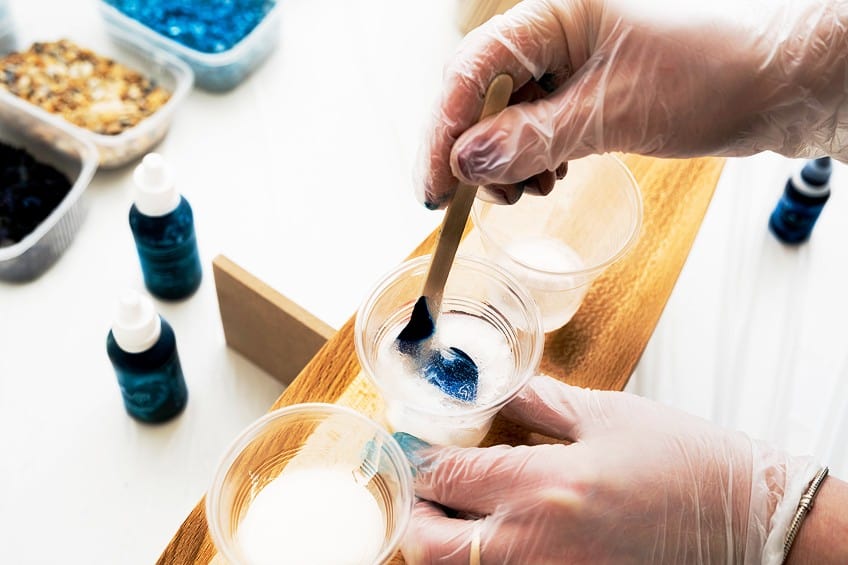
Add Your Color
You can now apply pigments to your resin to give it some color. You can separate your resin mixture into several plastic cups if you want to make a variety of different colors with the same batch of epoxy resin. Do not be overzealous when applying your pigments.
More often than not, you need way less than you would expect so start slowly with a few drops at a time.
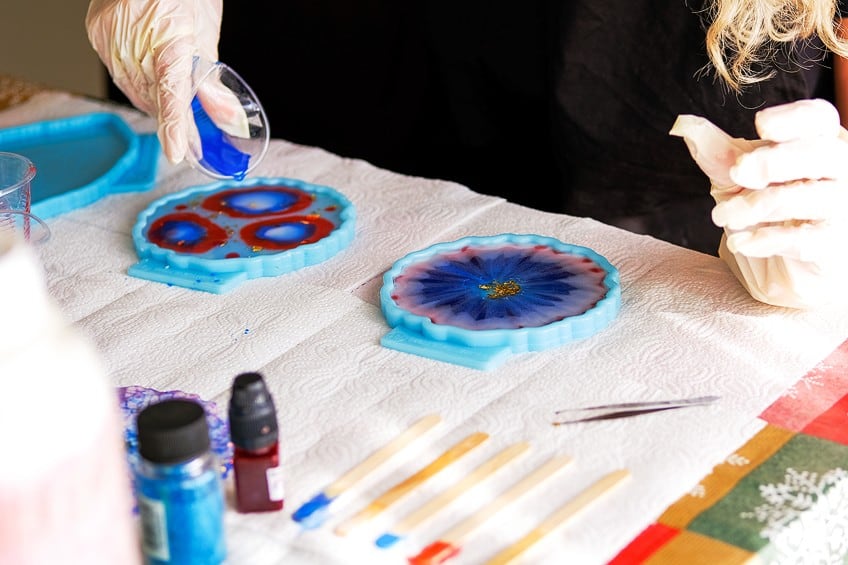
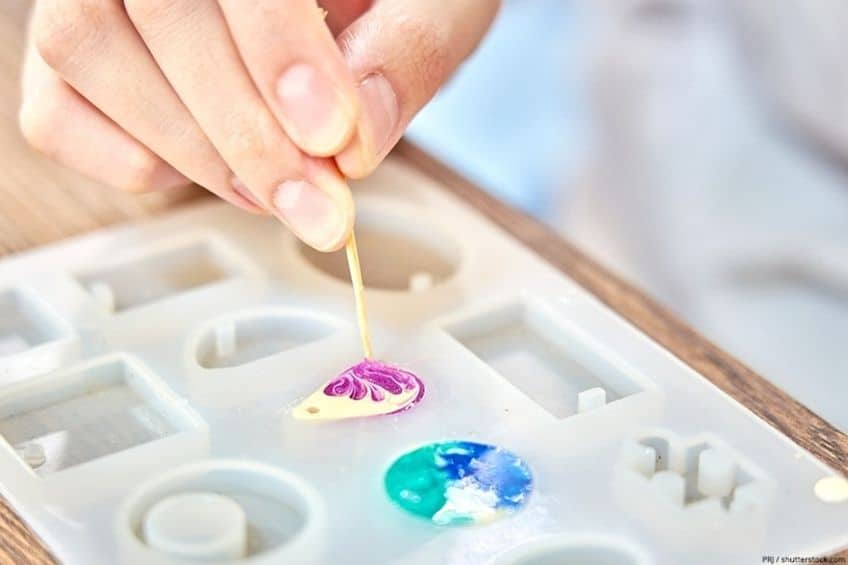
Now Paint!
You have now gotten to the fun part, but remember that you are still racing against the clock and only have so much time to apply your paint before it begins to harden. You can now pour your various colors of epoxy resin onto the surface of your workpiece. The artistic technique of this sort of painting comes from the various styles of pouring that one could use. These are some popular pouring techniques:
- Dirty pour
- Swirl
- Flip cup
- Puddle pour
- Air swipe
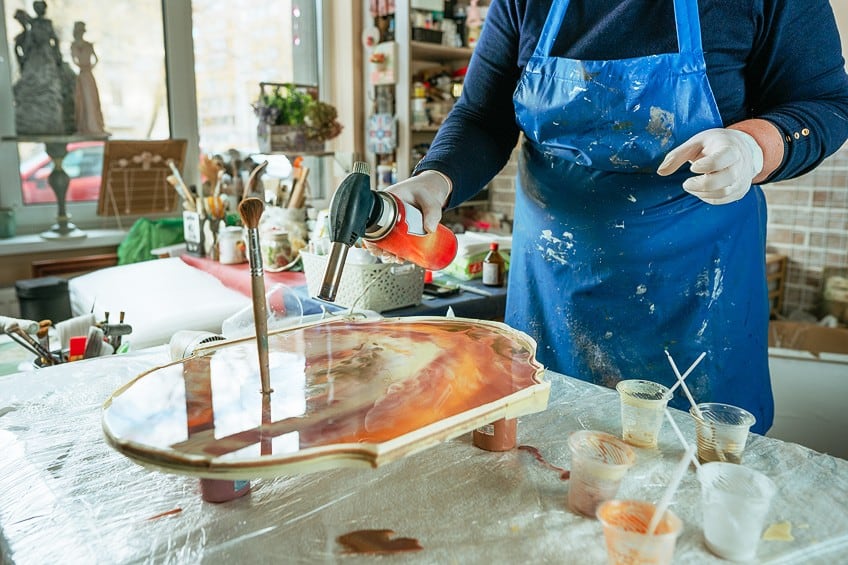
You can add further details and flairs by using different tools and items to alter and interrupt the flow of the resin as it spreads across your surface. You can use things like knives, brushes, foam rollers, and spatulas for this purpose. If you get any air bubbles, you should use a hair dryer or a butane torch to remove these trapped pockets of air. Just be sure to apply heat in brief bursts to prevent melting your painting.
Remember that once your epoxy resin starts curing, you should not apply any more to your painting surface.
Once the resin begins to set, its viscosity will increase. When this happens, your resin will become stringy like bubble gum when you try to move it. Most crucially, a resin that has begun to cure will no longer be able to self-level. Applying heat can help increase your window of opportunity before curing starts but only to a certain degree.
Ideally, you would want to prevent particles and other small materials (or even insects!) from making their way onto your artwork before the resin has dried completely. However, should this occur, you should use tweezers to carefully remove this rogue debris from the surface of your painting. Once you are done painting and have made certain that there are no more pockets of air stuck under the resin, you should find something to cover your artwork until it has completely dried.
The best thing to use as a cover for your painting is a box that fully encases your artwork without making contact with its surface.
Your resin will have to harden within 24 hours but will take up to three days to completely cure and set. Make sure that your resin sits at a static temperature throughout the drying process. If you feel that your painting needs more layers of epoxy paint, you may add more within five hours of applying the first layer.
Cleaning Your Tools
Once you have completed your painting, we recommend that you avoid kicking up your feet just yet. You should immediately get to cleaning the tools and containers you used to mix and apply the resin. Any plastic cups you used for the mixing and pouring can just be turned upside down on top of some foil.
Let them sit overnight to allow excess resin to trickle onto the foil. Next morning, you should then be able to easily separate the hardened resin from the plastic.
To clean your mixing utensil (preferably a spatula), you could do one of two things. Firstly, you can soak a cloth in vinegar and use it to wipe down the utensil. Secondly, you can instead soak a cloth in isopropanol and use that to clean excess resin off of the utensil. All other tools and appliances (like tweezers, torches, and hair dryers) can be cleaned using alcohol-based wipes.
All of the aforementioned tools, if cleaned, can be used in future resin painting projects.
The bad news is that you will not be able to reuse any rollers or brushes as it is virtually impossible to remove resin from these items. They are best disposed of after painting. Try not to leave wooden items in resin overnight as they are easy to bond to.
Resin Casting
Another incredibly popular form of resin artwork is casting which involves the implantation or casting of items in molds made of epoxy resin. The molds used in these projects are typically made of silicone given that they are both flexible and thus easy to remove after the resin has dried and also made of plastic so will not adhere to the resin. Silicone molds come in all sorts of shapes and sizes. The types of objects that one could cast in resin are endless provided that they fit within the silicone mold.
It is also important that artists are aware of the types of resin they use, though, because the resin most suitable for use may depend on what sort of materials the cast object is made of.
While there are several other molds one could use for casting resin, silicone is undoubtedly the best material to use. Not only is it flexible and thus easier to move, but it also allows the resin to harden in such a way as to produce a smooth and shiny surface. If you want to know how to make casting resin artwork, follow this guide on how to do so.
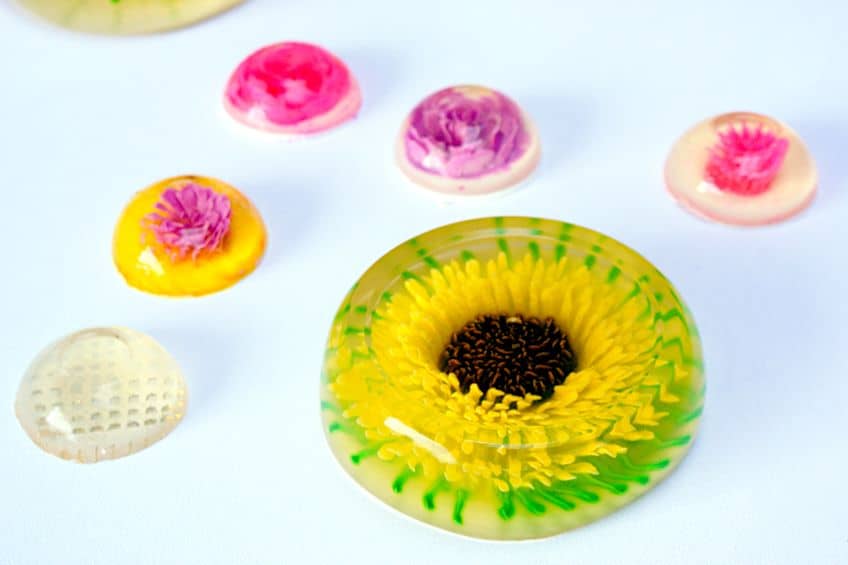
For the purpose of this guide, we are going to choose dried flowers as our casted objects.
Tools and Items You Will Need
- Nitrile gloves
- Silicone molds, e.g., heart-shaped
- Natural dried flowers
- Small hand drill
- Toothpicks
- Heat gun or butane torch
- Respirator mask
- Jute twine
- Craft sticks
- Mica flakes
- Sandpaper or micro mesh
- Mixing cups
- Plastic drop cloth
- Safety glasses
- Silica sand (optional)
How to Dry Your Flowers
You can dry your flowers out naturally by leaving them out in the sun without water but this could take several weeks to months to achieve. You can instead make use of silica sand, a granular material containing quartz. Also known as industrial sand, silica sand can be used to expedite the rate at which the moisture of your flowers is extracted.

To dry out your flowers using silica, start by a pouring 3 cm layer of silica into a deep tray or bowl. After that, begin placing your flowers on top of this layer. Once your flowers are in place, begin pouring more silica sand until your flowers are completely covered. Using this method of moisture extraction, your flowers should be completely dried within one to two weeks.
Preparing Your Workspace
Just like with resin painting projects, you are going to want to prepare your workspace before resin casting by making sure that you have all your protective gear, tools, items, and materials close at hand. Make sure that your work surface is covered by plastic sheets to make cleaning up easier.
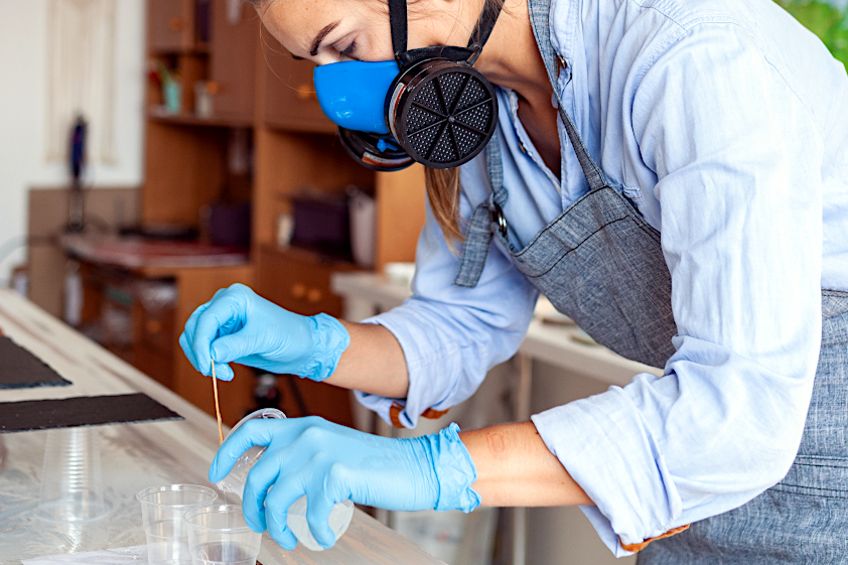
The personal protective equipment you should have when working with casting resin includes safety goggles, nitrile gloves, and a respirator mask.
Mixing Your Casting Resin
The casting resin you have chosen to use can now be mixed according to the specific instructions that come along with it. As touched on earlier, there are no universal ratios for how epoxy resin solutions are meant to be mixed. You would be surprised how many epoxy resin products have their unique mixing instructions. So, make sure to follow the instructions that should come attached in some way to your product when you buy it.

Before you use your mixture for casting, you should give it a thorough mix in the correct ratio of materials for a minimum of three minutes before then letting it sit for at least a minute to give any trapped air bubbles enough time to float up to the surface and escape. If you are having any difficulty with removing air pickets from your resin, you can also briefly apply heat from a blow torch or hair dryer.
Base Casting
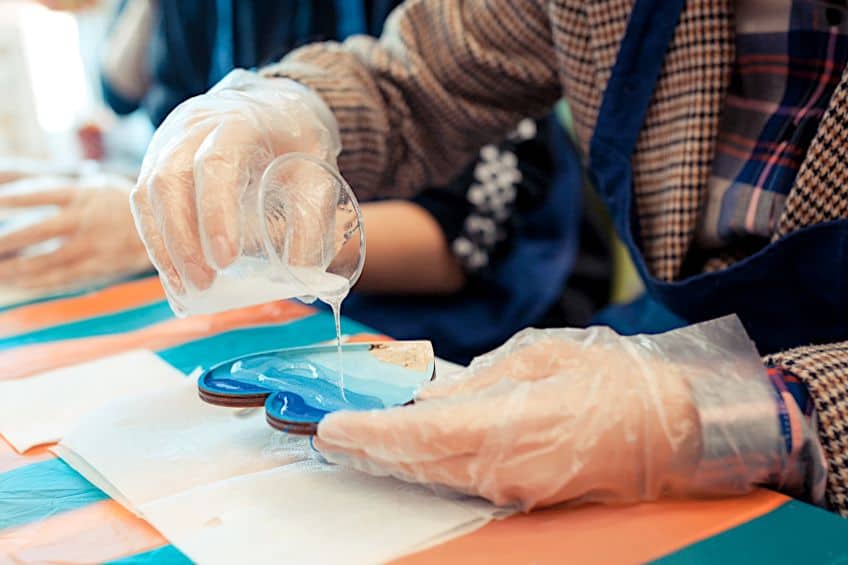
It is now time to cast the base. Grab your silicone mold and give it a good clean. You want to make sure that there are no foreign particles in your mold before you pour in the epoxy. To give the impression that your flowers are floating and suspended in the final project, apply a base layer before placing them inside and adding additional layers.
If you are working with a particularly deep mold, you may need to apply multiple layers before adding your flowers. If your base layer has any air bubbles, repeat the blow torch/hair dryer technique.
Applying Your Flowers
You can now begin placing your preferred assortment of flowers on top of the base layer. To prevent your flowers from creating negative space for air to get trapped, take a stick or use your gloved hand to shuffle them deeper into the base layer. Take your time when doing this to avoid tearing any of your flowers. The arrangement of your flowers is completely up to your discretion. Just remember that the bottom of your mold will become the front of your final piece so be sure to arrange your flowers accordingly. The best thing to do here is to place your flowers upside down.
First Cure
With your flowers now securely set within your mold, it is time for the first layer of resin to be cured. Before curing, make sure once again that there are no air bubbles still trapped inside. You can then follow the instructions on how to dry your resin provided by your chosen brand’s manufacturer. Make sure that your flowers remain in place during the curing process as it may sometimes cause them to shift around.
Do not wait until the first layer is completely dry before adding the second so that they can bond together nicely.
Second Layer and Cure
Once your first layer is cured enough, you can begin to pour the second layer. The second layer should be made from a new batch of resin so that it is of the appropriate viscosity. After you have filled the remainder of the mold with your second layer, you should once again ensure that there are no air pockets still trapped inside and apply heat where and if necessary. There is a slight chance that more bubbles may form during the drying process so be sure to keep an eye out for this as well. Now let it cure.
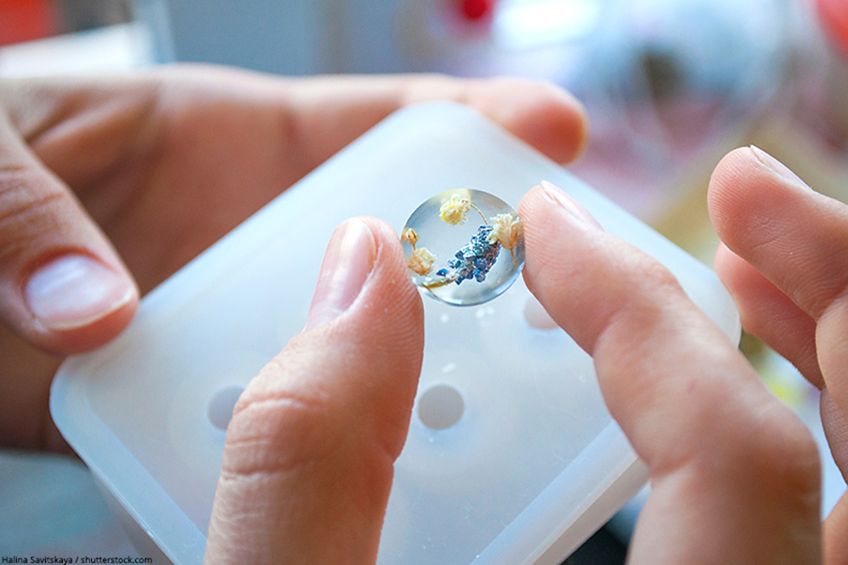
Removing the Mold
You should allow your DIY resin art to cure and harden for the period specified by the manufacturer on the instruction sheet provided with your epoxy resin materials. Once the surface of your resin is no longer sticky to the touch, though, you should remove it from the silicone mold and place it upright so that it sets properly once fully cured.
Make sure that you have cleaned and disinfected a perfectly horizontal surface for your resin artwork to rest on until fully cured.
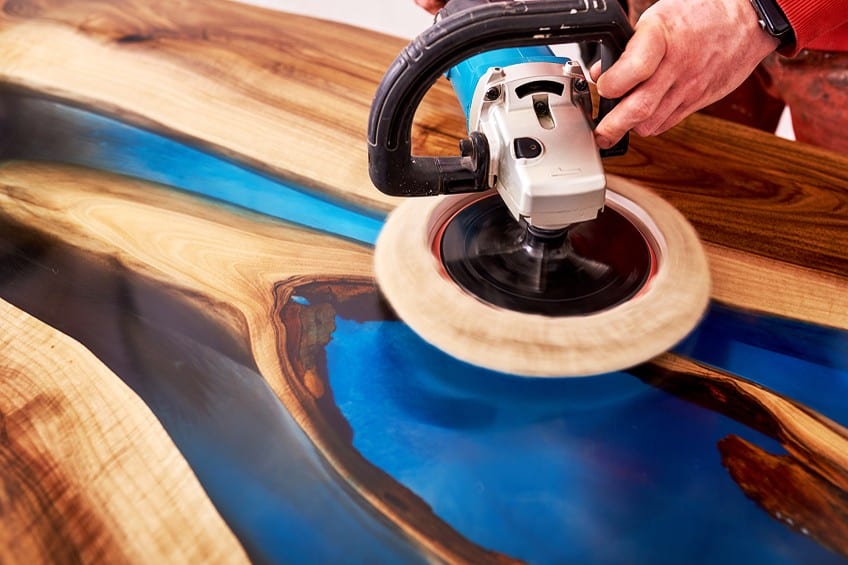
Finishing
Using either Micro Mesh or sandpaper with a low grit, you can now smooth any rough edges left behind on your now fully dried epoxy resin art. You may not always be required to sand down your pieces given that silicone molds tend to give resins a smooth texture. Make sure not to sand down any areas of your resin art that are already smoothed from the silicone mold. Make sure that your finished product does not spend too much time in the sun as this may affect its quality over time.

DIY Resin Art Ideas
Here are some other fun DIY resin art ideas you could also explore:
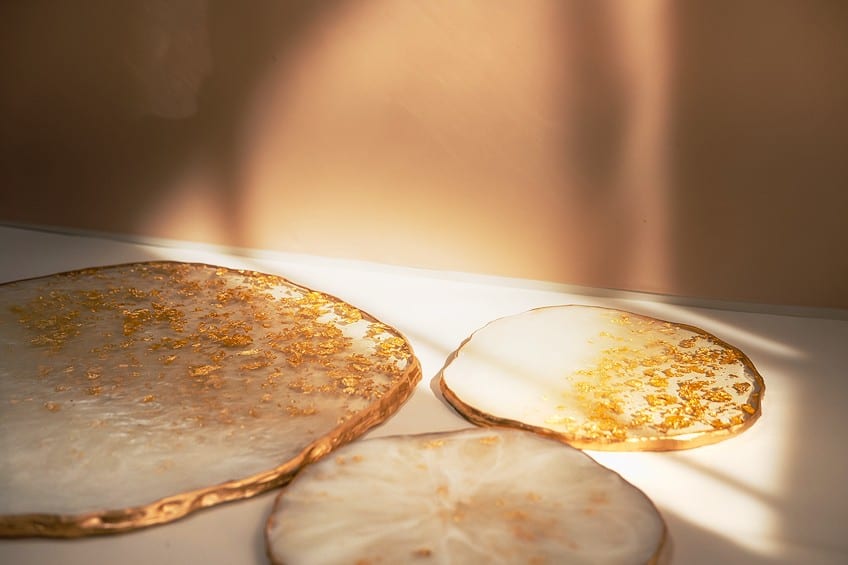
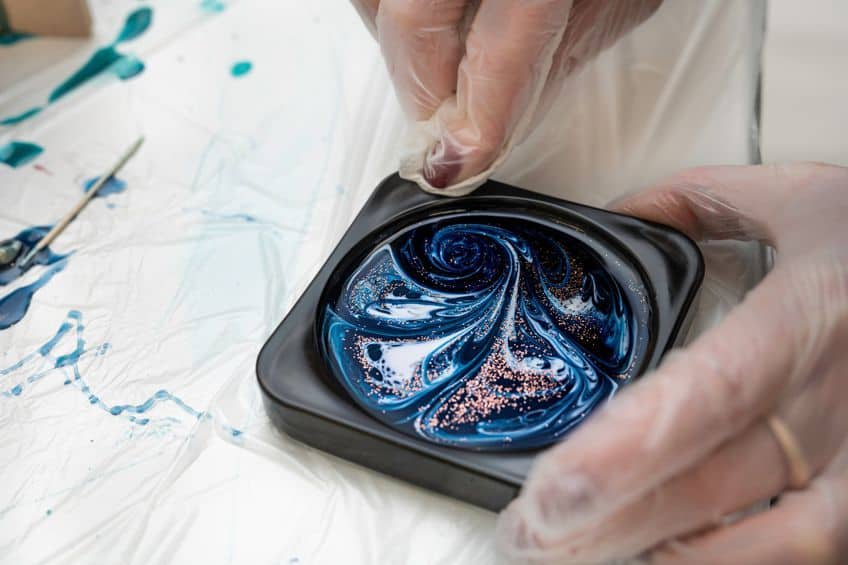
- Coasters
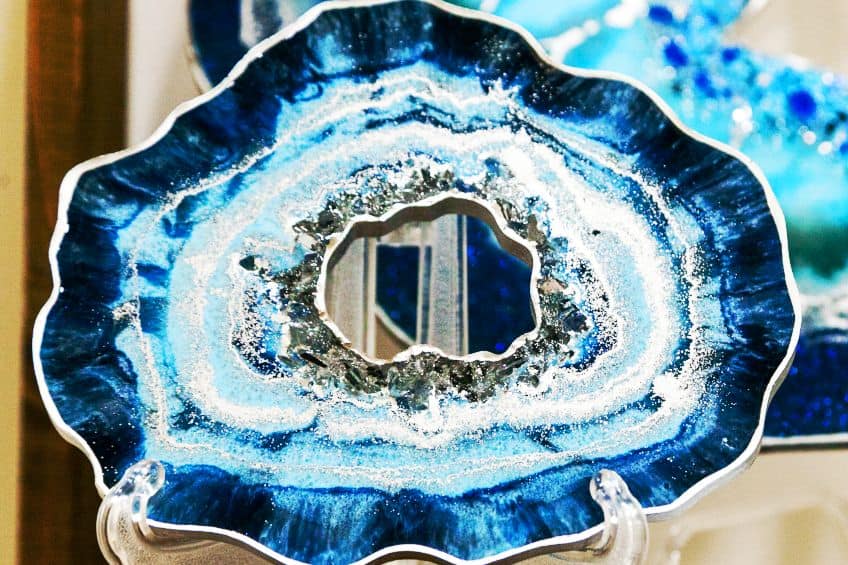
- Geodes
- Petri dishes
- Figurines
- Tabletops
Resin Art Safety Tips
Epoxy resin can be used to produce some of the most stunning works of art you have ever made. However, you need to understand the health risks posed by this product if used incorrectly. There is no such thing as a non-toxic epoxy resin since they are all made up of potentially hazardous materials. Exposure to these materials can cause some notable side effects such as:
- Respiratory issues
- Dermatitis
- Allergic dermatitis
- Chemical burns
- Significant skin or eye irritation
Therefore, it is extremely important to follow safety instructions when working with resin. Here are some guidelines to follow when using epoxy resin for either commercial or recreational use. By following these instructions, you will be able to prevent any dangerous exposure to epoxy resin:
- Evaluate the sort of project you are trying to perform and use the information you gather to determine the least hazardous type of epoxy resin that will get the job done.
- Make sure that you have prepared a safe and secure workspace. This includes covering surfaces with plastic and ensuring that the room you are working in is both well-ventilated and relatively temperature-controlled. Using fans can help clear out accumulating dust particles and vapors.
- Make sure that you have a safe and isolated unit designated for storing your epoxy resin art while it is curing.
- Ensure that you are wearing all the necessary personal protective equipment throughout your time working with epoxy resin products. Here is a list of the protective gear you want to wear: nitrile gloves, protective eye goggles, a long-sleeve shirt or jacket, protective overlaying garments, and a respirator mask.
Impact on the Environment
What is epoxy resin made up of? Among the materials used to create this product are toxic to humans, other animals, and all other forms of biological life too. This is something worth considering before using epoxy resin products; it can be bad for the environment.
If you have pets or live in an area with a lot of animals, you run the risk of exposing them as well as yourself to the toxic chemicals present within epoxy resins.
Epoxy resin is highly soluble in water which makes it particularly dangerous for our aquatic friends in the ocean. If not disposed of correctly, epoxy resin can enter water systems where its plastic particles will remain for thousands of years before biodegrading. Epoxy resin has been linked in the past to several deaths and diseases among the world’s oceanic wildlife. Epoxy resins are also flammable.
It may take extreme levels of heat to set epoxy resin on fire but it is possible and can lead to serious issues and health risks.
Furthermore, the solvents present in most epoxy resins are also highly flammable, only serving to make the product more dangerous for the environment. We advise that you ensure that your use of epoxy resin is conducted in the safest way possible and that you dispose of excess epoxy in a safe way that prevents it from affecting the environment. While epoxy resin art is not the most sustainable creative pursuit, you can still do things to reduce the environmental impact of using them.
So, there you have it! If you have made it this far into the article, you should be equipped with more than enough knowledge on how to tackle your own resin art projects. You can now use the information on how to work epoxy resin we have provided you with in tandem with our instructions on how to make resin art to produce your next creative masterpiece.
Frequently Asked Questions
What Do I Do If I Get Epoxy Resin on My Hands?
If your hands are a bit sticky from working with the resin, start by washing them with vinegar. Once you have gotten the resin off your hands, you can switch over to some soap and water. If you have any patches of resin left over that are harder to remove, you can use rubbing alcohol to remove them. Be advised, however, that this should only be done when required since alcohol can easily dry out the skin on your hands. You can also get safer hand-cleaning agents from craft and hardware stores. Prevention is, however, better than cure. You should always ensure that your hands are covered with nitrile gloves whenever you are working with epoxy resin.
How Do I Fix a Damaged Resin Painting?
There is a slight chance that once your epoxy resin painting dries it will be left with some indentations, cavities, or holes. This could be due to you having applied too much resin or not enough, which is something to consider at the beginning of your project to prevent this from happening. If your final painting has any of these issues, you will have to gently sand the damaged surface of your painting with low-grit material and apply a new layer of epoxy resin.

Megan is a writer and researcher who holds a degree in Social Sciences, with a specialization in Psychology and Environmental Science, from the University of Cape Town. Her dedication to acquiring knowledge and making a positive impact has driven her current work in promoting conscious and sustainable growth in Southern Africa. Megan’s interests encompass exploring the physical and psychological impacts of color in our environment on our mood and well-being. She is also passionate about the role of art and creativity, which has been an integral part of society since the beginning of human history. Since 2022, Megan has been contributing blog posts on painting and color theory at artfilemagazine.
Learn more about Megan van Schoor and about us.
Cite this Article
Megan, van Schoor, “Resin Art – Learn Everything About Making Art with Resin.” artfilemagazine – Your Online Art Source. September 27, 2022. URL: https://artfilemagazine.com/resin-art/
van Schoor, M. (2022, 27 September). Resin Art – Learn Everything About Making Art with Resin. artfilemagazine – Your Online Art Source. https://artfilemagazine.com/resin-art/
van Schoor, Megan. “Resin Art – Learn Everything About Making Art with Resin.” artfilemagazine – Your Online Art Source, September 27, 2022. https://artfilemagazine.com/resin-art/.