Framing in Photography – How to Create Impactful Photographs
You may be wondering what framing in photography means and what it is all about. In this article, we will be discussing, in detail, what framing in photography is, and exactly how you can use it to take your photography to the next level. Many believe that framing in photography is meant only for professionals, but if you are an amateur photographer, then it may be time for you to put this technique to the test and see what it can do for your photography. We will be discussing various techniques on how to incorporate framing into the composition, and we will also give you some examples from the masters themselves. So, read further to discover the amazing technique of framing in photography.
What Is Framing in Photography?
Many amateur photographers do not care about framing photographs but just mechanically press the shutter button and shoot everything without consciously choosing their shots. You should consider various aspects, like the direction of the shot, composition, colors, and technique. Is it a close-up shot or is it a distance from the subject?
So, what is framing in photography? Framing in photography simply means the compositional technique of drawing attention to the subject by blocking out other parts of the image and forming a frame around the main object in the photo. The main goal of framing photographs is to draw the attention of the viewer to the most important aspect of the photograph.
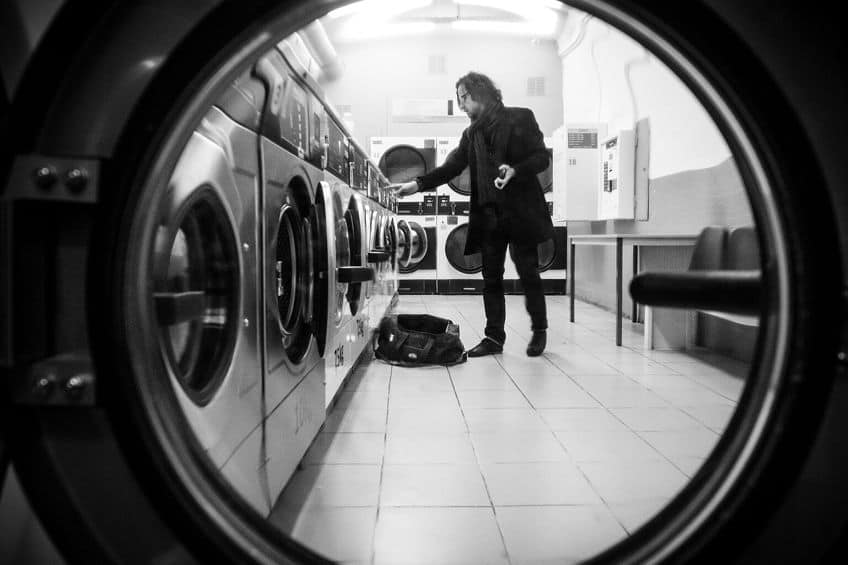
 Untitled (2016) by Thomas Leuthard; Thomas Leuthard from Zug, Switzerland, CC BY 2.0, via Wikimedia Commons
Together with the composition technique comes framing, which is one of the main elements of photography every artist should be aware of. Using frames for your composition helps to bring out the depth of the photo, and creates a three-dimensional look and feel. Framing your photographs is one of the many ways you can compose your images that is very easy to do.
Frames can be fixed or set in the center or along the edges of your photograph. It can also cover all four sides or only one or both edges. The frames can be different forms or objects, like branches, windows, arches, tunnels, doorways, or even other people in the photograph. Framing photographs can produce a variety of effects, such as giving context to the photograph by revealing something about that person, or the place where it was taken. It can also create an illusion of depth, and by using natural elements or architectural objects, you can provide the viewer with the feeling of walking in the photographer’s shoes and seeing the world through their eyes.
Framing in photography can be used in many types of photographs, such as portraits, documentaries, lifestyle, landscapes, street scenes, and countless more. In fact, most photographs can contain framing.
Photography Framing Techniques
Several different photography framing techniques can make your snapshots stand out from the rest. They can be used on their own or you can combine them, it all depends on what you want to achieve with your photography.
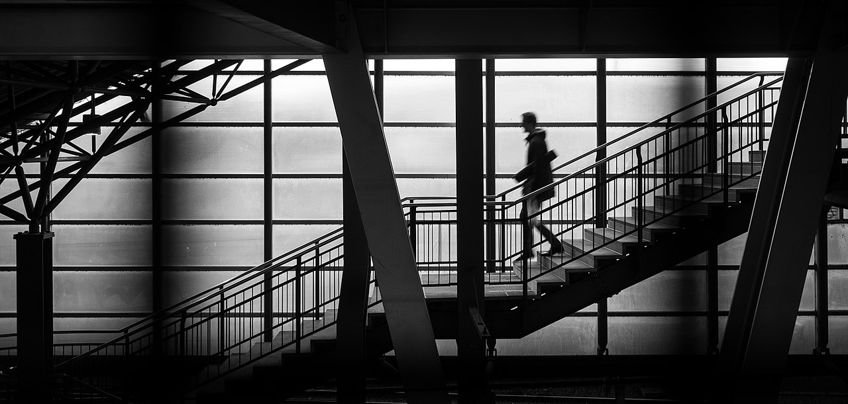
 Untitled (2016) by Thomas Leuthard; Thomas Leuthard, CC BY 2.0, via Wikimedia Commons
Rule of Thirds
This is a very simple photography technique. Divide your photo frame into nine equal sections, which means three across and three down. Some cameras even display this technique on the grid in view mode. The secret lies in placing the most important element of your photograph where the lines intersect or on one or more of the lines.
Our natural tendency is to place the main subject right in the middle of the photo, but by placing it slightly off-center, using this technique, you can produce a more attractive photography composition.
Foreground Interest and Depth
All photographs are naturally two-dimensional, so including a foreground will automatically give your photograph a three-dimensional effect. Including a foreground in your shot will add a real sense of depth to your photograph, giving you the feeling that you are very close to the main subject of your photograph.
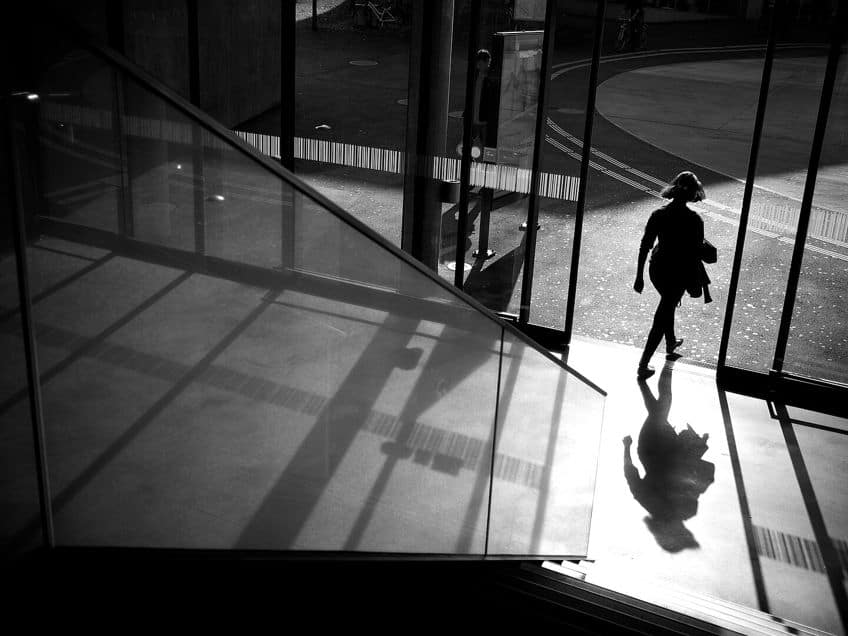
 Untitled (2014) by Thomas Leuthard; Thomas Leuthard from Zug, Switzerland, CC BY 2.0, via Wikimedia Commons
Leading Lines
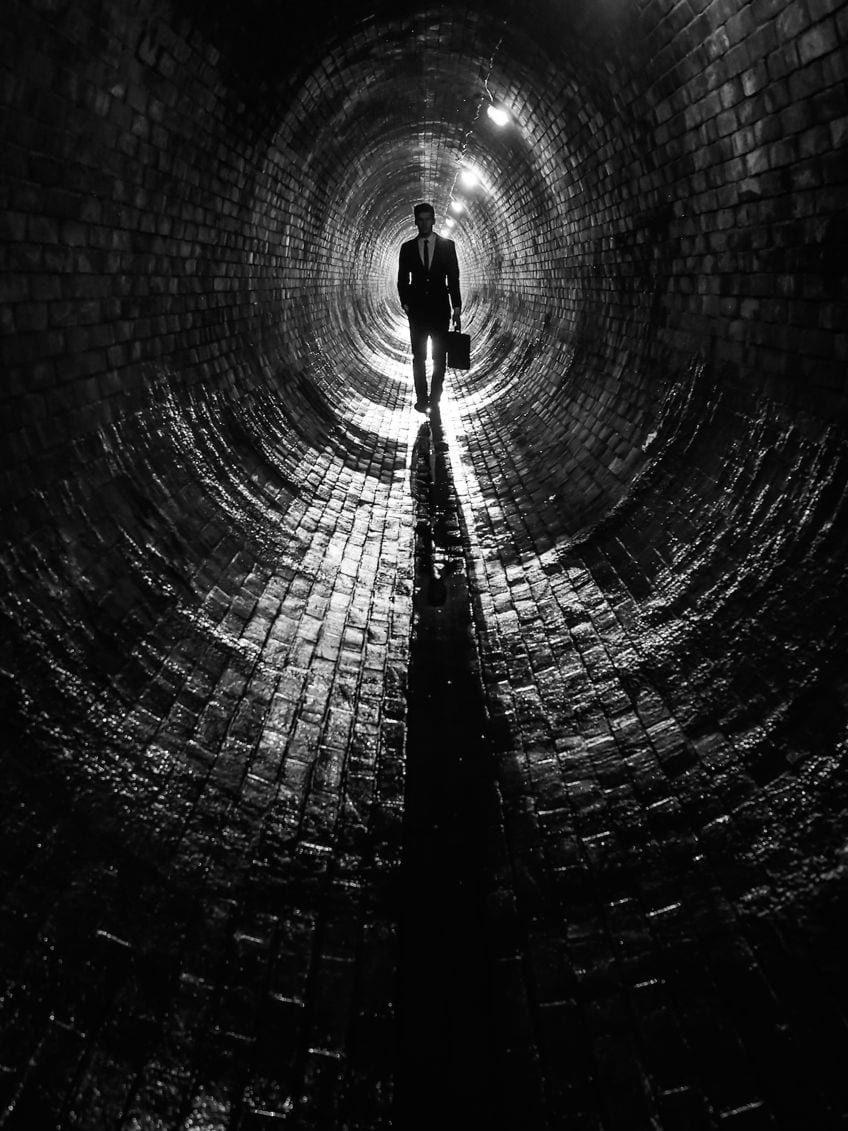
Using leading lines allows the viewer to focus their attention on the most important elements of your photograph. For example, it may be paving stones that form lines leading to the main object in the distance. In this case, the main object should be in the center of your scene, centering the composition in symmetry with all the surrounding elements of the scene. However, there is no law to state that the leading lines need to be straight, you can have a path that has curved lines.
However, it will still lead the viewer to the main object of your scene.
Diagonals and Triangles
Using diagonals and triangles can add dynamic tension to your photograph, as vertical and horizontal lines indicate stability. Take, for example, a person standing straight up on an even or level horizontal surface. They will appear to be reasonably stable, however, if this same person is on a sloping surface, it will create a certain level of visual tension, almost jarring our sense of balance. In our everyday lives, we are not accustomed to diagonals that would subconsciously imply a sense of instability. So, the use of triangles and diagonals in your photograph can create a real sense of dynamic tension. Try to incorporate diagonals and triangles that are already part of the scene in as many natural objects as you can see.
 Untitled (2014) by Thomas Leuthard; Thomas Leuthard from Zug, Switzerland, CC BY 2.0, via Wikimedia Commons
Patterns and Textures
It appears that most of us are naturally drawn to any form of pattern, which suggests harmony and is visually attractive to us. When using photography framing techniques, patterns can be anything, from the arches of a building to petals on a flower. Incorporating these patterns into your photograph can create a very pleasant composition, and using less textures is also very pleasing to the human eye. Buildings themselves can incorporate patterns in the form of arches, which can complement the shape of the roof, like a domed or flat roof.
Patterns can also be evident in the texture of the building walls, and arches can also create a frame within a frame, which is another type of photography framing technique.
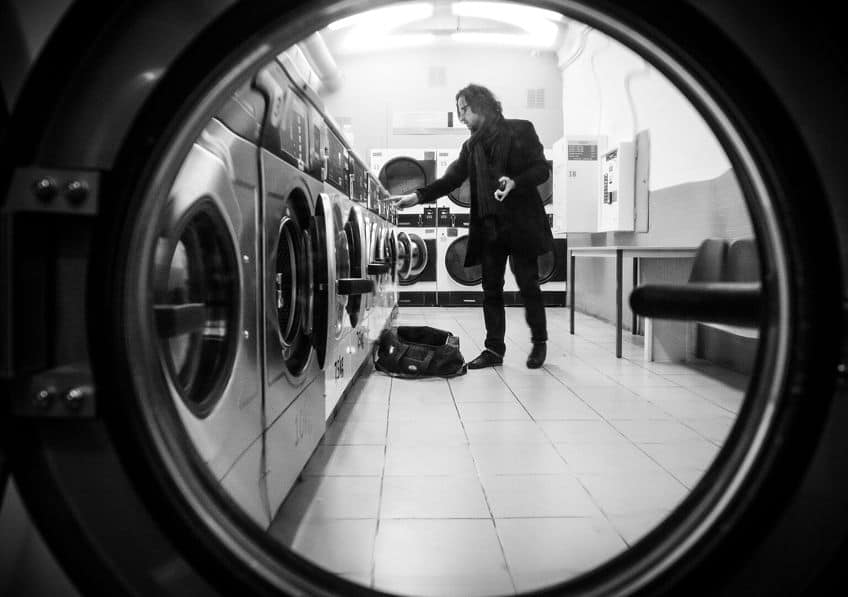
Fill the Frame
This simply means that you leave no space all around the subject, which helps to keep the viewer’s attention completely on the main subject, with no distractions. It also allows the viewer to explore all the details of the subject which would have been impossible if the photograph was taken further away. Filling the frame means that the photographer must get up very close to the subject, which can produce very original and interesting compositions.
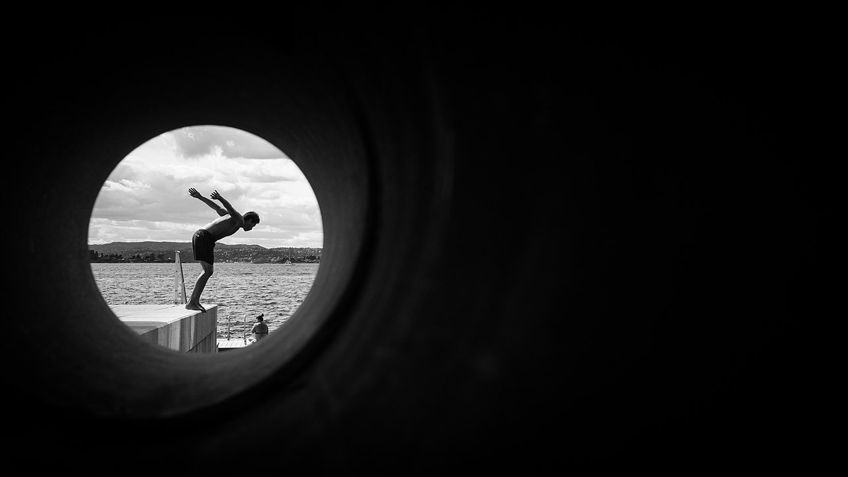
 Untitled (2013) by Thomas Leuthard; Thomas Leuthard from Zug, Switzerland, CC BY 2.0, via Wikimedia Commons
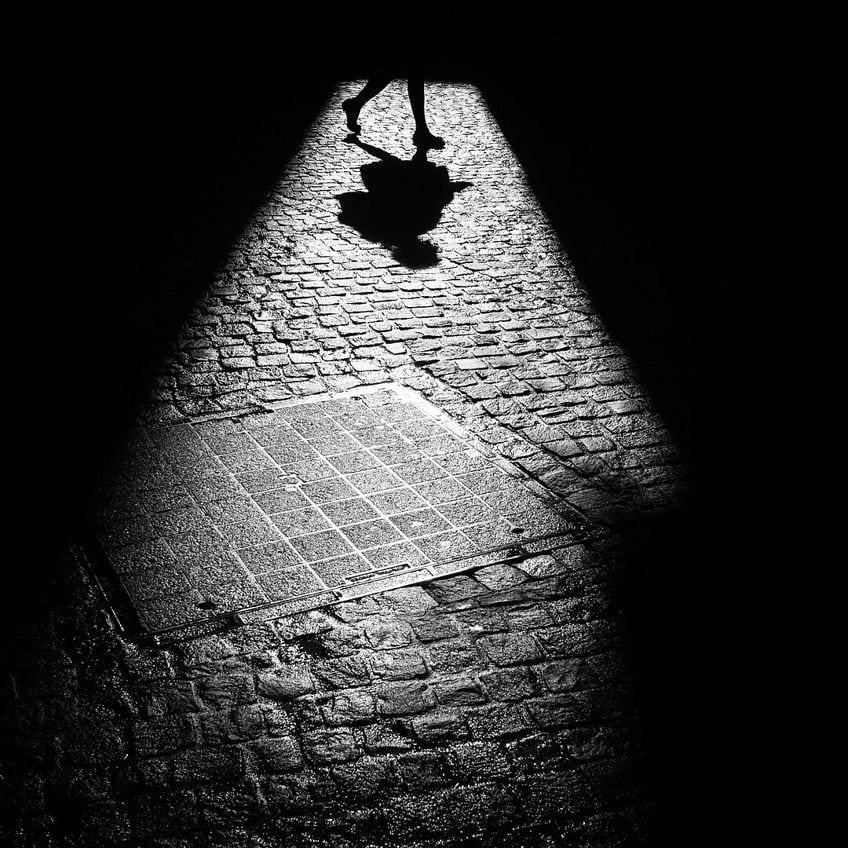
Light and Shadows
Using natural light or shadows in your frame can also be very effective, which will not only highlight the subject but also the beautiful light. The light on the subject allows the viewer to focus only on the subject with very few distractions. Similarly, the shadows are both centered in only one place, leaving the viewer to focus their attention on that space alone.
There are many more photography framing techniques that you can try, such as the rule of odds, black and white, isolating the subject, shooting from above, shooting from beneath, juxtaposition, golden ratio, using layers in the frame, adding human interest, waiting for the decisive moment, and many more.
How to Use Photography Framing?
All these techniques you have been reading about may have left you slightly confused, so we have provided some examples, which will help you to understand the principles better and allow you to put them into practice.
 Reduced to Perfection (2015) by Thomas Leuthard; Thomas Leuthard from Zug, Switzerland, CC BY 2.0, via Wikimedia Commons
Windows and Doors
Doors and windows are very easy to incorporate into your framing, and you can find them in many different places, like your home, surrounding buildings, familiar streets, and shopping centers. You can use them from the inside and look out on a scene, or take it from the outside looking in, using the door or window to surround your main subject. This type of photography framing is perfect for full-body photos or if the door is big enough you can use it as a frame for a family portrait.
It is not only the windows that can be used as framing for your photo, but even the curtains are a perfect framing tool as well.
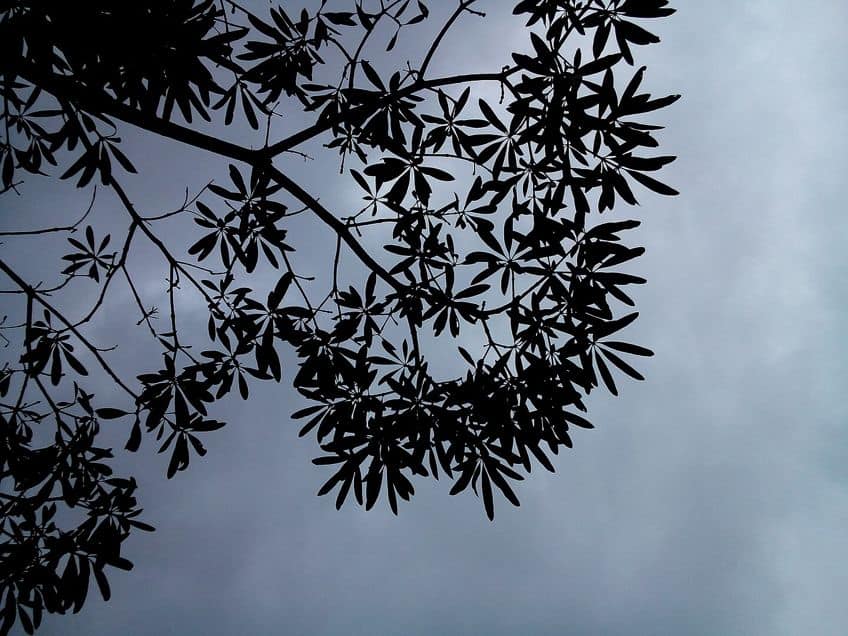
Trees, Branches, and Bushes
Trees are amazing framing tools, where you can have trees on both sides of your subject or an overhanging branch at the top as a partial frame. You can have bushes or shrubs on either side of your subject, let your subject peel through the leaves of the tree, or have some flowers subtly placed around your subject. Remember, no rule says you have to have the trees or branches equally spaced on either side of your subject. There could be a small tree on one side, with some other form of landscape elements on the other side, they all work together to create the perfect frame.
 A clear click of a tree trunk with its leaves forming an art. At Orion Mall, Bangalore (2015) by Saranya M; Saranya M, CC BY-SA 4.0, via Wikimedia Commons
People
People can also be a very interesting framing tool. When focussing on a small child, the legs of the adult can be a perfect frame, or a group of people that are on the scene can be used as a frame by selecting your subject and waiting for the other people to fall into place, you may have to be patient and wait for the right moment to take your shot. There are many more objects that you can use as a frame for your subject, like archways, tunnels, mirrors, boat portholes, cave openings, and stairways.
You can easily find objects for your photo framing almost anywhere, all you need to do is use your imagination.
Examples of Framing in Photography
Many famous photographers used framing in photography to achieve many of the techniques in their photographs. Framing in photography can show the viewers something about where the photo was taken, and it can tell them something about the artist. With all the benefits framing in photography has to offer, established and emerging photographers around the world are making use of this type of technique. Let us now consider a few of the well-known examples of framing in photography, and how effective the technique was in their photographs.
 O (2017) by Thomas Leuthard; Thomas Leuthard from Zug, Switzerland, CC BY 2.0, via Wikimedia Commons
Hyeres, France (1932) by Henri Cartier-Bresson
| Photographer | Henri Cartier-Bresson (1908-2004) |
| Title | Hyeres, France |
| Date Completed | 1932 |
| Medium | Gelatin silver print |
| Gallery | Museum of Modern Art, Metropolitan Museum of Art, New York, Art Institute of Chicago, Museum of Fine Arts, Houston, and Tate Modern Museum, London |
| Place of Origin | Hyeres, Southeastern France |
Henri Cartier-Bresson was a French artist and a humanist photographer, and his best work was candid photography. He started street photography using a 3 x 4-inch camera, and his photographs were always to capture a decisive moment.
He also started painting when he was five years old.
In his famous photograph Hyeres, France (1932), he made use of the stationary surrounding architecture by using the staircase as a frame to focus on the fast-moving cyclist. The photograph was taken from above and looking down on the curving staircase and the road, while leaving the top and left corners open.
Valley View from Wawona Tunnel (1936) by Ansel Adams
| Photographer | Ansel Adams (1902-1984) |
| Title | Valley View from Wawona Tunnel |
| Date Completed | 1936 |
| Medium | Gelatin silver print, mounted |
| Gallery | Museum of Modern Art, New York, and Ansel Adams Gallery |
| Place of Origin | Yosemite, California, United States |
He was a landscape photographer who was well-known for his black-and-white images, concentrating on the American West. At 12 years of age, he was given his first camera and soon began to develop his photographic works. He signed up with the United States Department of Interiors, focussing on photographs within the national parks.
He also helped establish the photography branch at the Museum of Modern Art in New York.
One of his best-known works was the Valley View from Wawona Tunnel (1936) photograph, where he used the edges of the cave to form a frame. This enabled the viewers to focus on the mountains with the background of the Yosemite Valley. This was a brilliant way of using this technique to frame the objects he had in mind and create a dramatic effect that made this photograph stand out.
Low Angle of Naval Academy Lining the Stairway in Mauri Hill (1937) by Alfred Eisenstaedt
| Photographer | Alfred Eisenstaedt (1898-1995) |
| Title | Low Angle of Naval Academy Lining the Stairway in Mauri Hill |
| Date Completed | 1937 |
| Medium | Gelatin silver print |
| Gallery | US Naval Academy Museum |
| Place of Origin | Annapolis, Maryland, United States |
Alfred Eisenstaedt was born in Germany and was a photographer and photojournalist. He started his career in Germany before the Second World War but was only recognized as a photographer when he moved to America, where he became a staff photographer for Life magazine.
He was famous for capturing important people in the news and many of the Americans returning from the war.
In his famous photograph, Low Angle of Naval Academy Lining the Stairway in Mauri Hill (1937), he used people as his frame, the sailors that gathered on the stairway were his frame, which he used to highlight the ceiling above them.
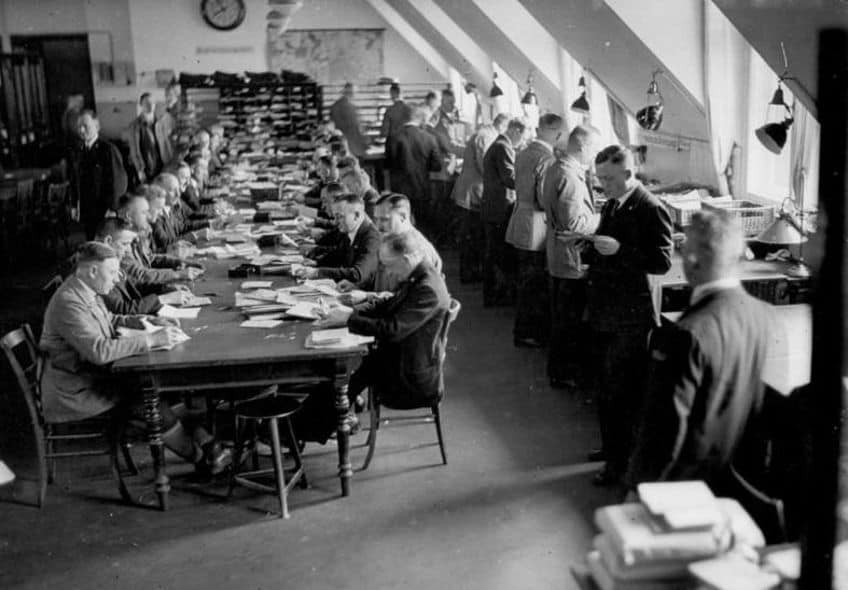 Deutsche Bank Disconto Company, Postal Department (1930) by Alfred Eisenstaedt; Bundesarchiv, Bild 183-2007-0307-510 / Eisenstaedt, Alfred / CC-BY-SA 3.0, CC BY-SA 3.0 DE, via Wikimedia Commons
Self Portrait in Police Van (1940) by Arthur Fellig
| Photographer | Arthur Fellig (Weegee) (1899-1968) |
| Title | Self Portrait in Police Van |
| Date Completed | 1940 |
| Medium | Gelatin silver print |
| Gallery | International Center of Photography, New York City |
| Place of Origin | Manhattan, New York City, United States |
Arthur Gellig was a well-known photographer and photojournalist and was involved with black-and-white street photography in New York. Many people will remember him by his pseudonym “Weegee”. He started working as a press photographer in Manhattan, and his work entailed realistic scenes of urban life crime, injury, and death.
He also worked in cinema, making his own short films, as well as publishing photography books.
In his photograph Self Portrait (1940), he made use of the framing photography technique, by using the doors of a police van as a frame. The image was taken from the inside of the police van, showing the viewer information about where the photograph was taken, shifting the attention away from the subject, and focusing on the surrounding area.
Maria Las Vegas (1970) by Lee Friedlander
| Photographer | Lee Friedlander (born 1934) |
| Title | Maria Las Vegas |
| Date Completed | 1970 |
| Medium | Gelatin silver print |
| Gallery | Museum of Modern Art, New York City |
| Place of Origin | Nevada, United States |
Lee Friedlander is an American artist and photographer in the 1960s and 1970s. He was involved in urban landscaping, where many of his photographs included structures that were framed by fences, reflections of storefronts, street signs, and posters.
He also made use of the framing technique of architectural elements, reflections, and the natural environment as frames.
He is very well-known for his America by Car (1995-2009) series, where he used objects like mirrors and car windows as a frame for things he encountered on his road trips through the country. However, for his photograph, Maria Las Vegas (1970), he used a different approach. He used light as a frame, highlighting the woman in his photograph with light and shadows, while the remainder of the image fades away in black.
Maybe you would like to give framing in photography a try? It is very easy, as all you need to do is look around your home, your garden, or in your neighborhood, to try and find a frame. It can be a door, a window, a mirror, an archway, light, shadows, people, trees, or branches. There are many things that you can use for a frame, so simply set your camera up and begin shooting!
Frequently Asked Questions
What Is Framing in Photography?
Framing in photography is the use of certain techniques that incorporate some elements of a scene. This creates a frame around your main object and emphasizes an object by using natural elements. The frame could be something like doors, windows, light, shadows, shapes, people, and much more.
What Is a Common Rule When Framing Photographs?
Photography framing makes use of natural elements in a scene or can be artificially produced. The subjects should be organized in such a way that the shot or picture is pleasing to the eye. The most common rule for photography framing is the rule of thirds.
What Are Some Photographic Framing Ideas?
There are many photographic ideas that you can use as a frame, such as using light and color or using different shapes or visual contrasts. You can also use natural frames like doors or windows, frame an image using buildings or other structures, and so much more.

Jordan Anthony is a Cape Town-based film photographer, curator, and arts writer. She holds a Bachelor of Art in Fine Arts from the University of the Witwatersrand, Johannesburg, where she explored themes like healing, identity, dreams, and intuitive creation in her Contemporary art practice. Jordan has collaborated with various local art institutions, including the KZNSA Gallery in Durban, the Turbine Art Fair, and the Wits Art Museum. Her photography focuses on abstract color manipulations, portraiture, candid shots, and urban landscapes. She’s intrigued by philosophy, memory, and esotericism, drawing inspiration from Surrealism, Fluxus, and ancient civilizations, as well as childhood influences and found objects. Jordan is working for artfilemagazine since 2022 and writes blog posts about art history and photography.
Learn more about Jordan Anthony and about us.
Cite this Article
Jordan, Anthony, “Framing in Photography – How to Create Impactful Photographs.” artfilemagazine – Your Online Art Source. September 13, 2023. URL: https://artfilemagazine.com/framing-in-photography/
Anthony, J. (2023, 13 September). Framing in Photography – How to Create Impactful Photographs. artfilemagazine – Your Online Art Source. https://artfilemagazine.com/framing-in-photography/
Anthony, Jordan. “Framing in Photography – How to Create Impactful Photographs.” artfilemagazine – Your Online Art Source, September 13, 2023. https://artfilemagazine.com/framing-in-photography/.